A Step-by-Step Guide to Deploying a Static Website with Azure Storage and Visual Studio Code


Requirements:
In order to utilize Azure Storage, it is essential to possess an active Azure subscription. If you do not possess a subscription, kindly create a free account before commencing.
All interactions with Azure Storage are channeled through a designated storage account. For the purpose of this quickstart, create a storage account via the Azure portal, Azure PowerShell, or Azure CLI. If you require assistance with the creation of a storage account, click here.
This guide uses Visual Studio Code to construct the static website and facilitate its deployment to an Azure Storage account.
Once Visual Studio Code is installed, proceed to install the Azure Storage preview extension. This extension seamlessly integrates Azure Storage management features into Visual Studio Code. You will utilize this extension to deploy your static website to Azure Storage. Follow these steps to install the extension:
Open Visual Studio Code.
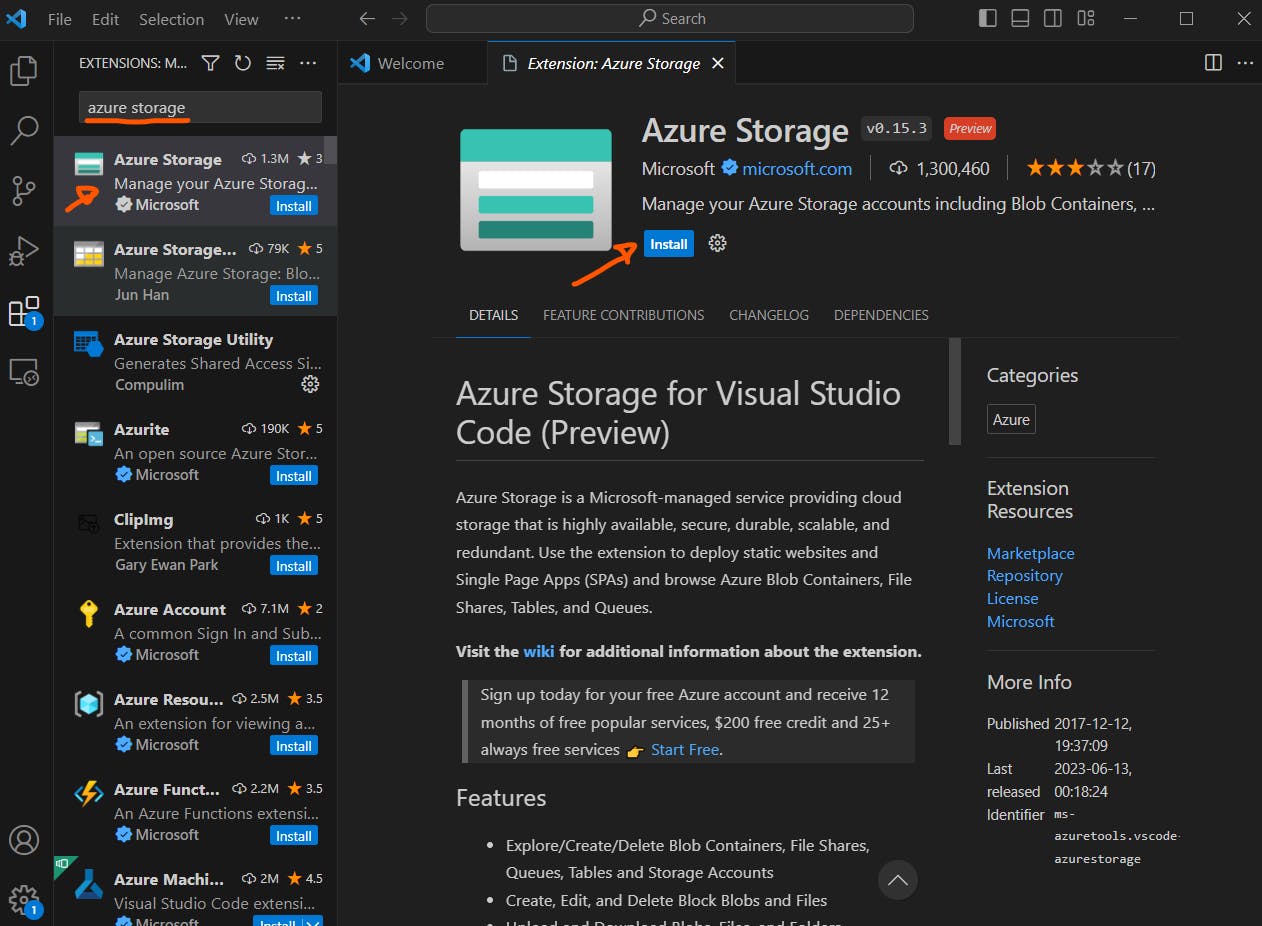
Navigate to the toolbar and select Extensions.

Search for "Azure Storage" and choose the Azure Storage extension from the displayed list.
Click the Install button to initiate the extension installation process.
Then sign-in to Azure Portal.
Setup static website hosting
To set up static website hosting in the Azure portal, the initial step is to configure your storage account. When you enable static website hosting for your account, Azure Storage automatically generates a container named $web. All the files for your static website will be housed within this $web container.
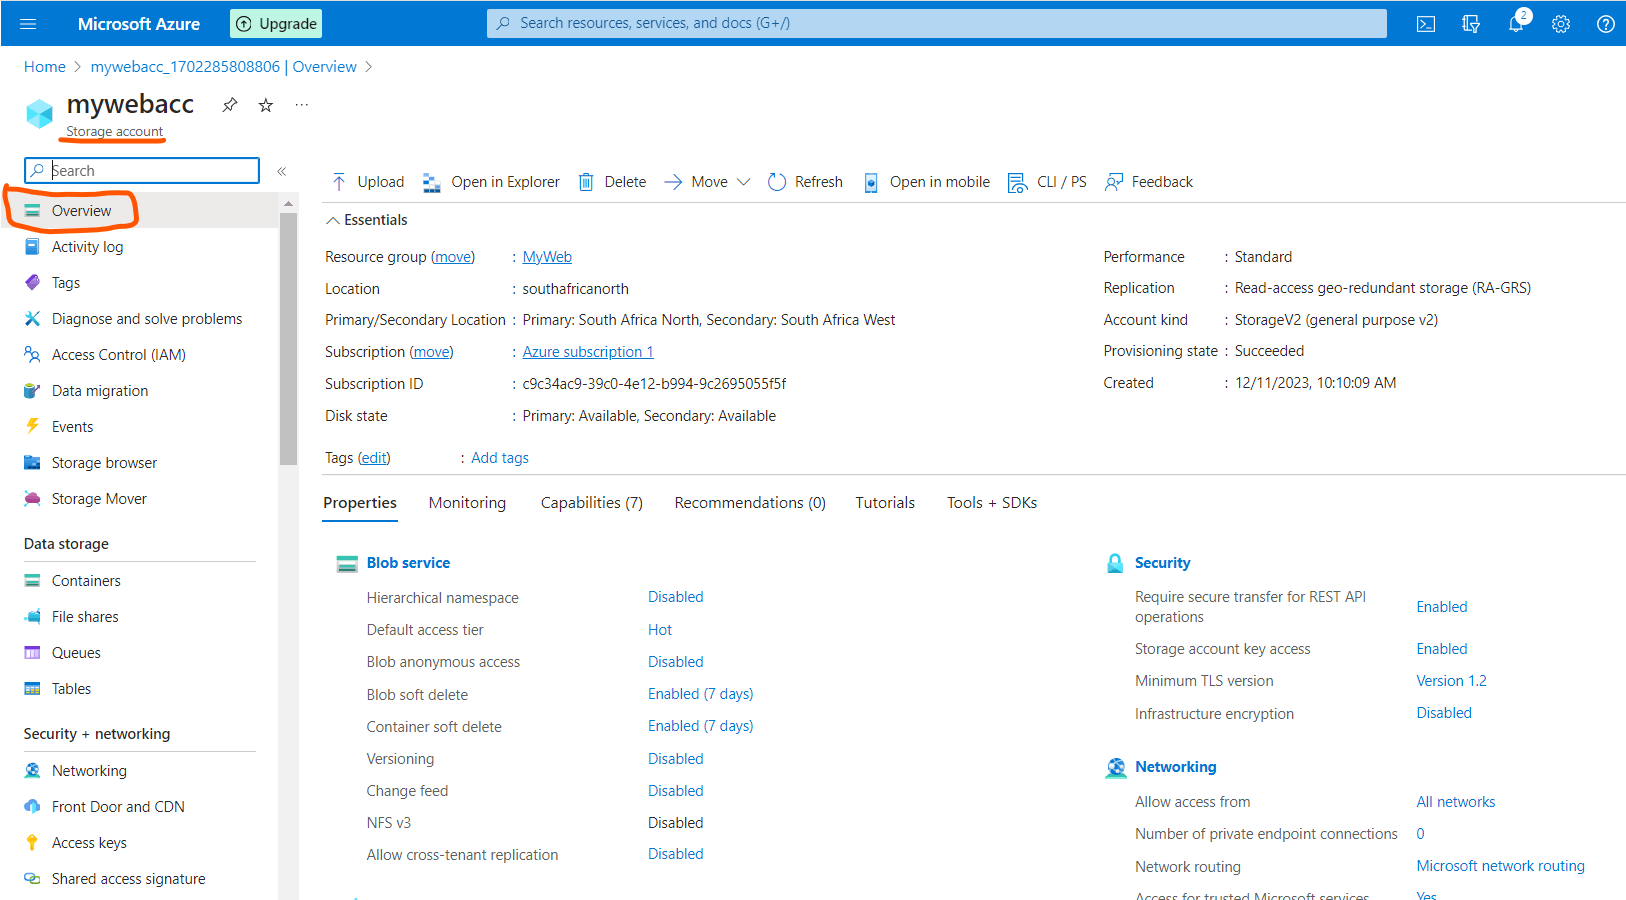
Log in to the Azure portal using your web browser.
Find and access your storage account, then go to the account overview.
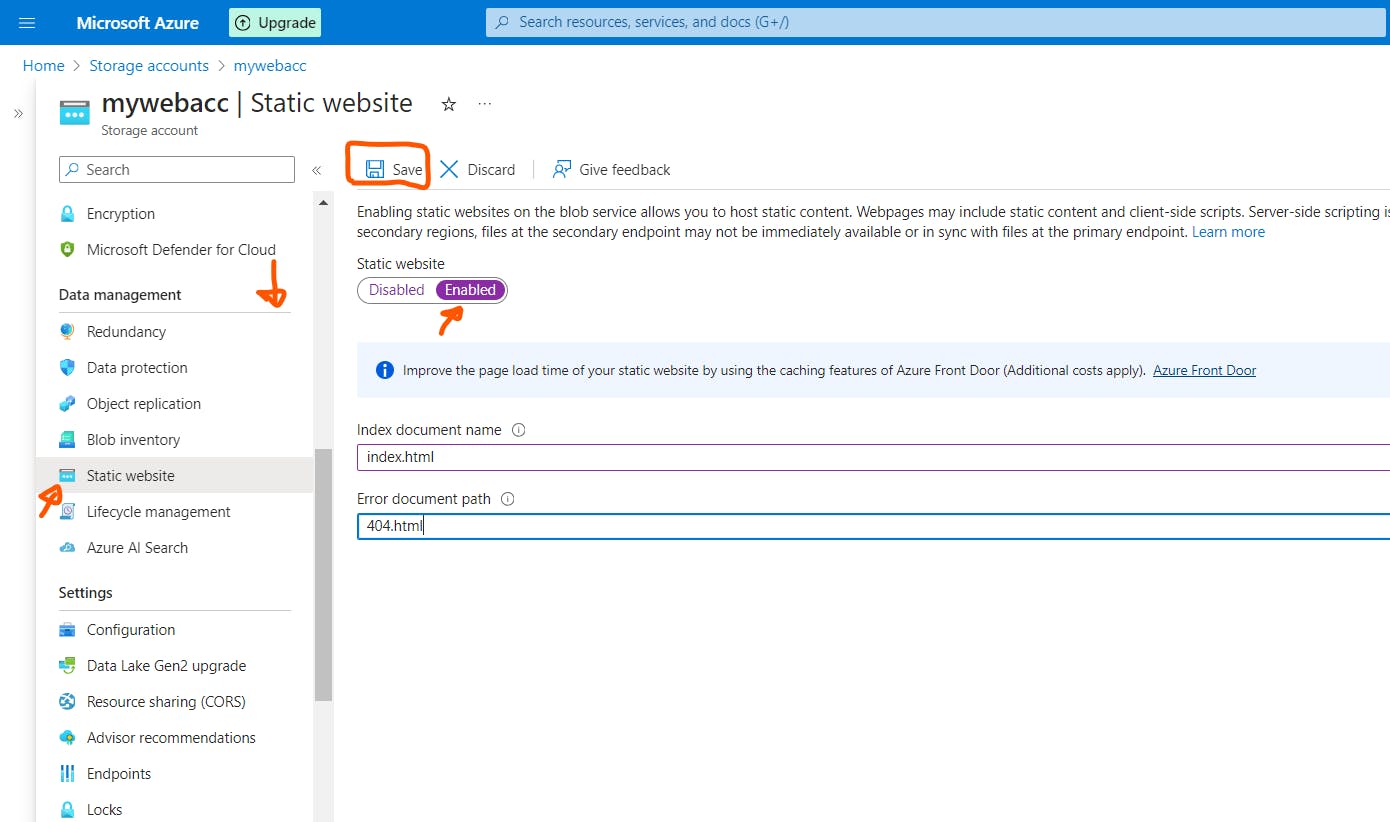
Then scroll down under Data Management section, choose "Static website" to access the static website configuration page.
Toggle the switch to "Enabled" to activate static website hosting for the storage account.
In the "Index document name" field, set the default index page to index.html, which appears when users navigate to the root of your static website.
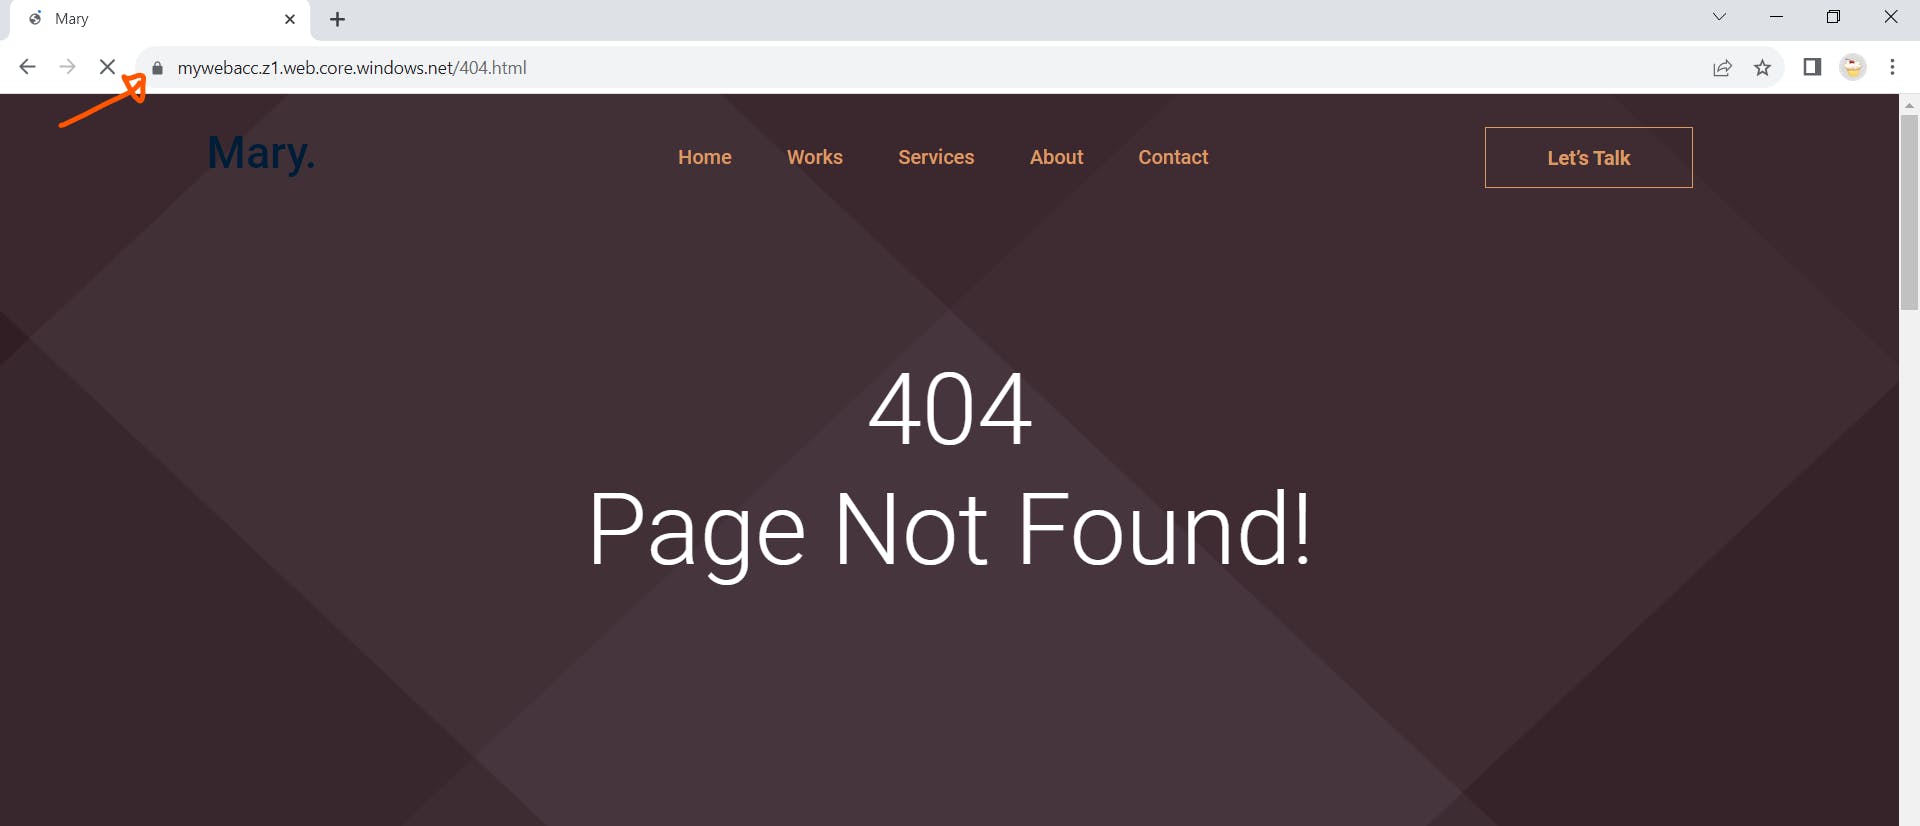
In the "Error document path" field, set the default error page to 404.html, displayed when a user attempts to access a non-existent page in your static website.
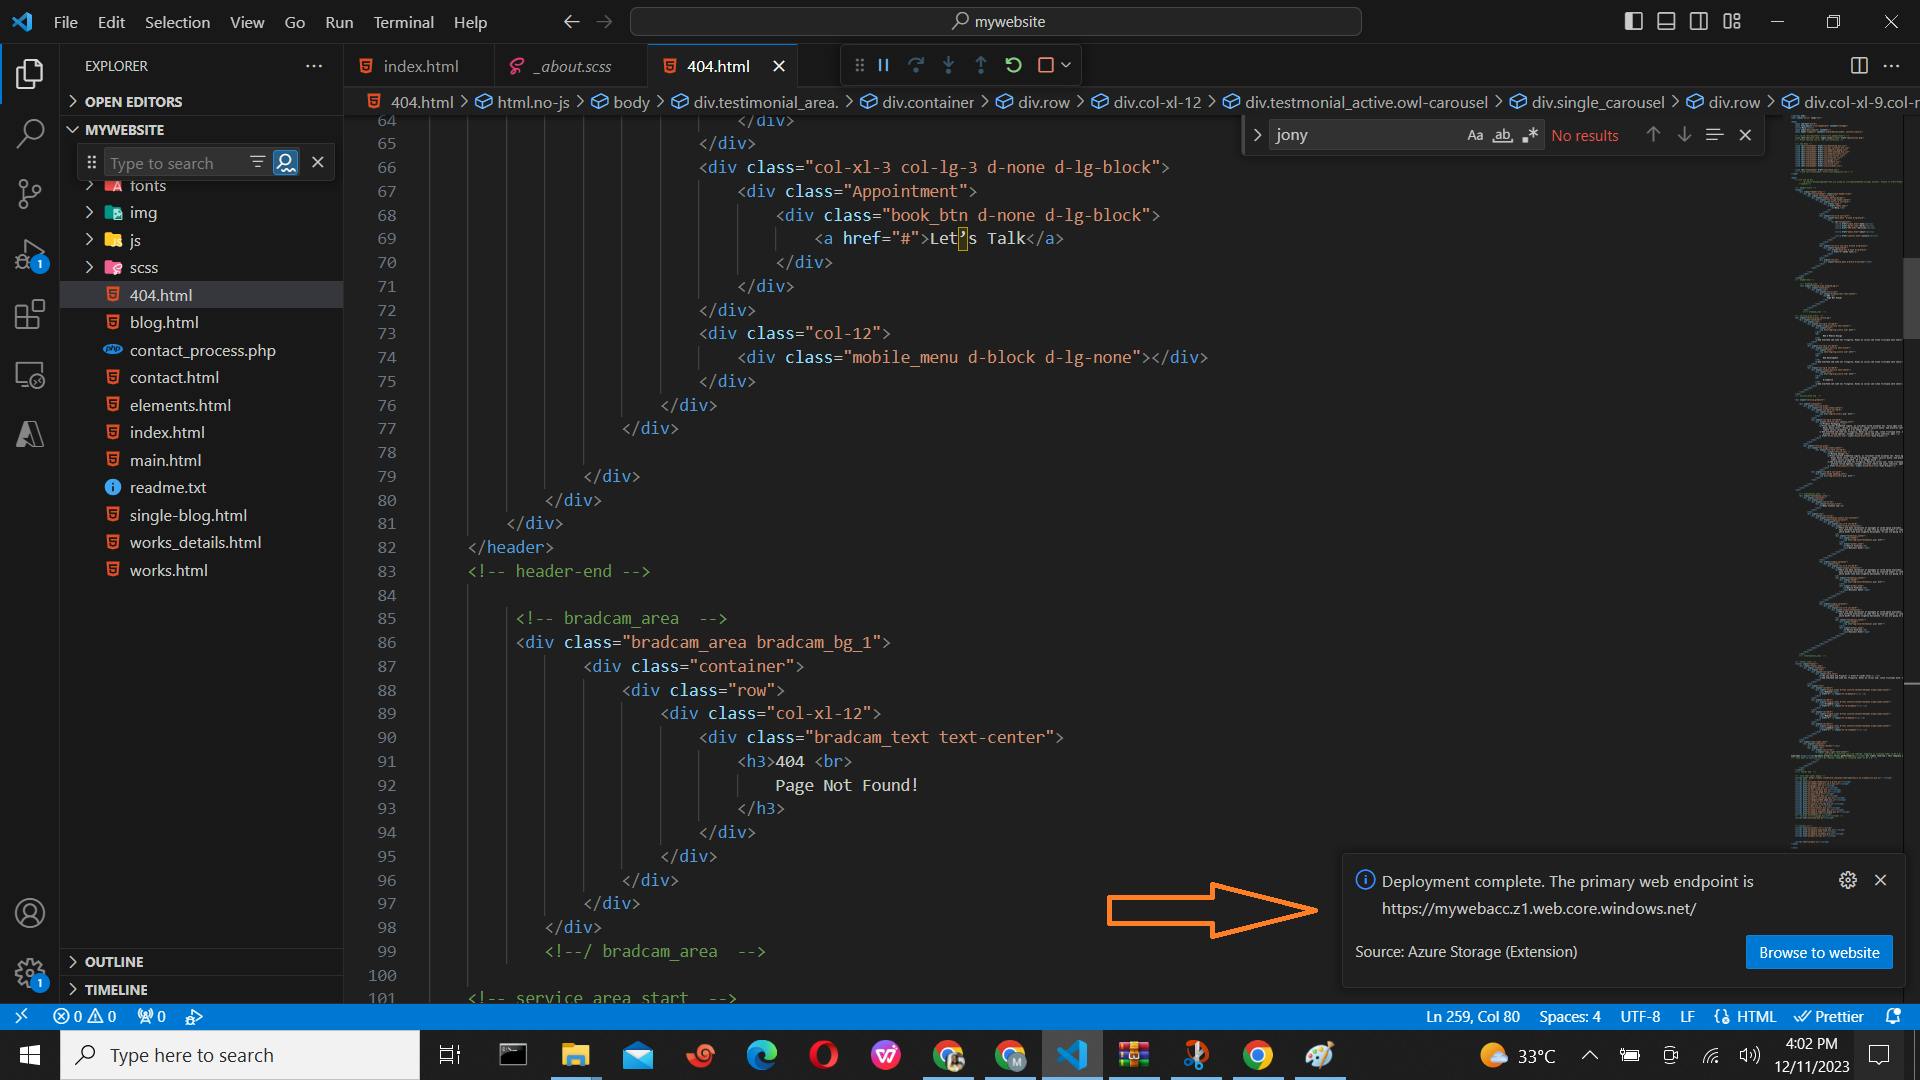
Click "Save." The Azure portal will now show your static website endpoint.
Deploy your website
Proceed by creating your website using Visual Studio Code and deploying it to the static website hosted in your Azure Storage account:
Create an empty folder called "mywebsite" on your local file system.
Open Visual Studio Code and access the folder you just created using the Explorer panel.
Open index.html in the editor, edit to your taste and save it.
To generate the default error file, create a file named "404.html." Open this file in the editor, paste the following text, and save it:
 <!DOCTYPE html>
 <html lang="en">
 <head>
     <meta charset="UTF-8">
     <meta name="viewport" content="width=device-width, initial-scale=1.0">
     <title>404 - Page Not Found</title>
 </head>
 <body>
     <h1>404 - Page Not Found</h1>
     <p>The requested page could not be found. Please check the URL or navigate back to the homepage.</p>
 </body>
 </html>
Ensure to save the changes made to the file.
Perform the following steps to deploy your website:
Right-click under the "mywebsite" folder in the Explorer panel.
Select "Deploy to Static Website..." to initiate the deployment process.
Follow the prompts to log in to Azure and retrieve a list of subscriptions.

When prompted, select the specific storage account associated with your static website. This ensures that the deployment is directed to the correct storage account with static website hosting capabilities.
Click on the endpoint to view your webpages.

Navigate to the Azure portal, and within your storage account, access the "$web" container under the Containers section. Here, you will observe that all your static website data has been successfully deployed into the container.

References
For more information, you can check out - https://learn.microsoft.com/en-us/azure/storage/blobs/storage-blob-static-website-host