

In this hands-on lab, you're tasked with pushing a .NET Core application (with tests) to Azure Repos and then building and testing it using Azure DevOps. You'll be provided with the necessary code and guided through the steps to accomplish these tasks.
Once you've successfully completed the build job, you have finished this lab.

Prerequisites
Before diving in, make sure you have the following:
An Azure Account (with subscription).
An Azure DevOps account (you can sign up for free).
Basic understanding of Git and Azure DevOps concepts.
Step 1: Setup Azure DevOps
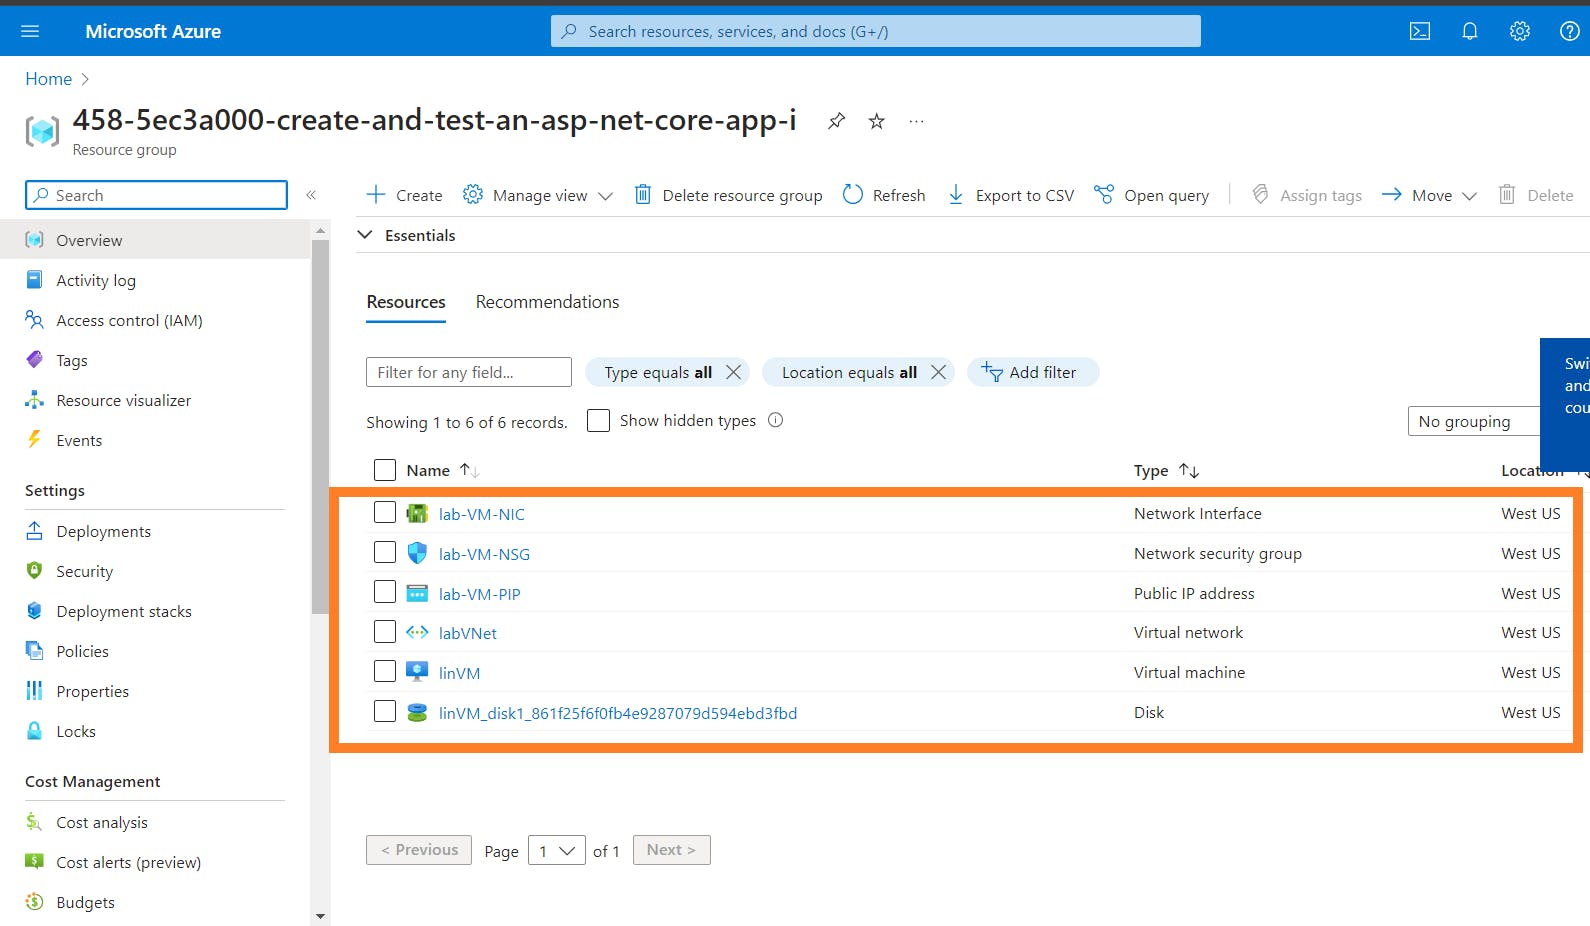
First I had all the resources above launched on my Azure Portal.
Next, I went on the search bar, search and selected Azure DevOps Organization.

Next select "My Azure DevOps Organizations"

Then fill in the form with your details to login, when done click "Continue".
Next, click "Create new organization".

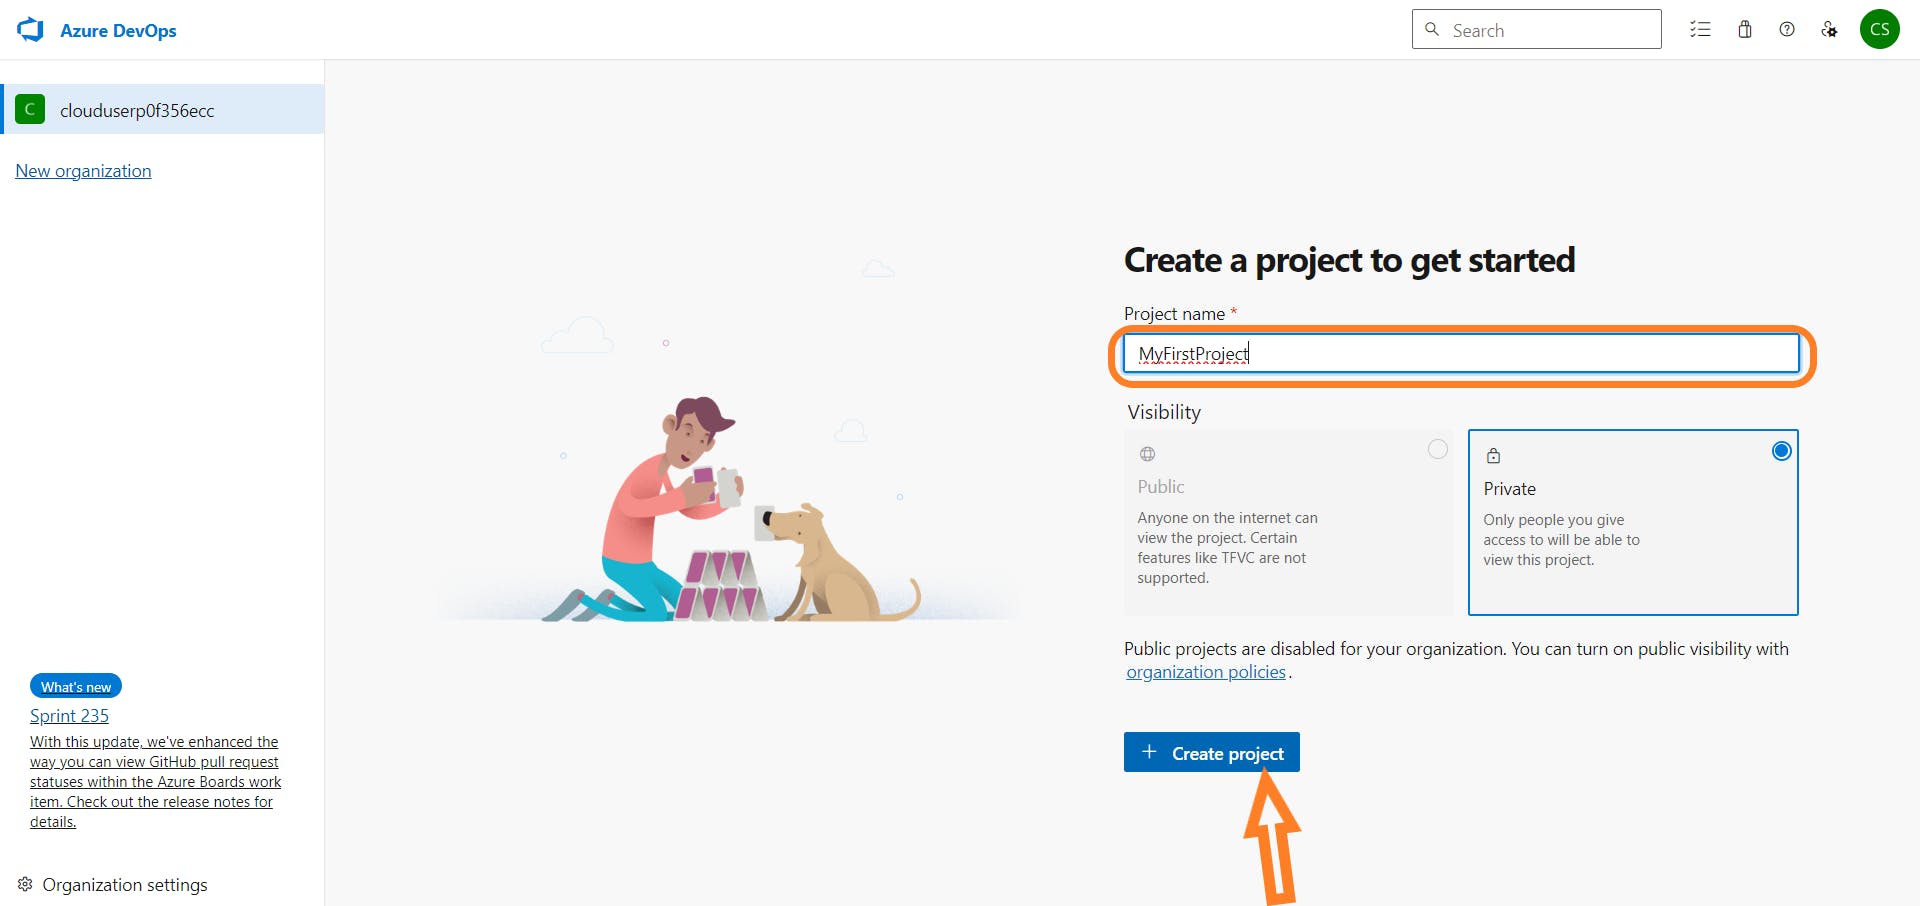
Continue to fill the form, then create a new Project.
The next thing to do is to disable these following toggles that comes at default.
To do this go to Organizational settings at the bottom left, Navigate to Settings under Pipeline, then toggle these to ensure they're disabled.

Step 2: Set Up Azure Repos
Navigate to the Repos tab and create a new repository for your ASP.NET Core application.

Clone the repository from git using command line.
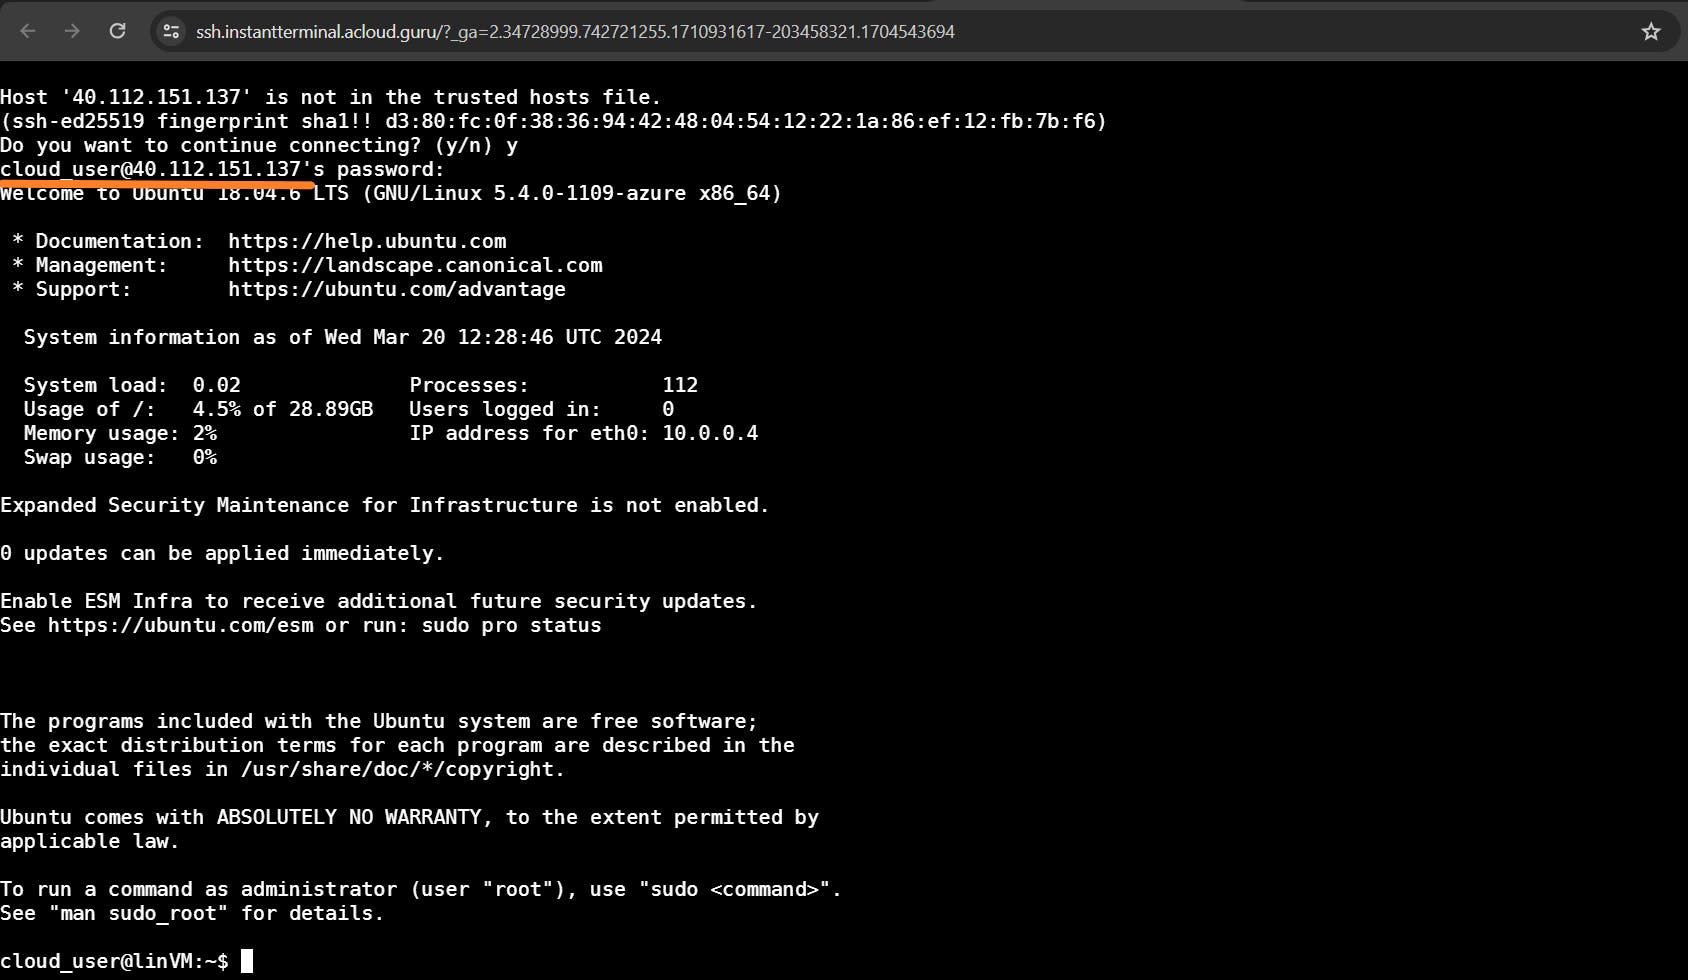
To get started on this task there's need to SSH login into my Linux VM titled "linVM"
On the terminal, enter the command "SSH cloud_user@40.112.151.137"
Next is to run the git clone command,
git clone -b unit-testhttps://github.com/ACloudGuru-Resources/content-az400-lab-resources.gitspecifying the exact branch which is "unit test". Click to view the repo on Github.

Next check the contents in linVM with the
lscommand.Next ran
git remote -vto get the remote origin because we are planning to remove it.Then, ran command
git remote remove originthis command is used to remove the remote so we can add the one from the Azure Repos repository.
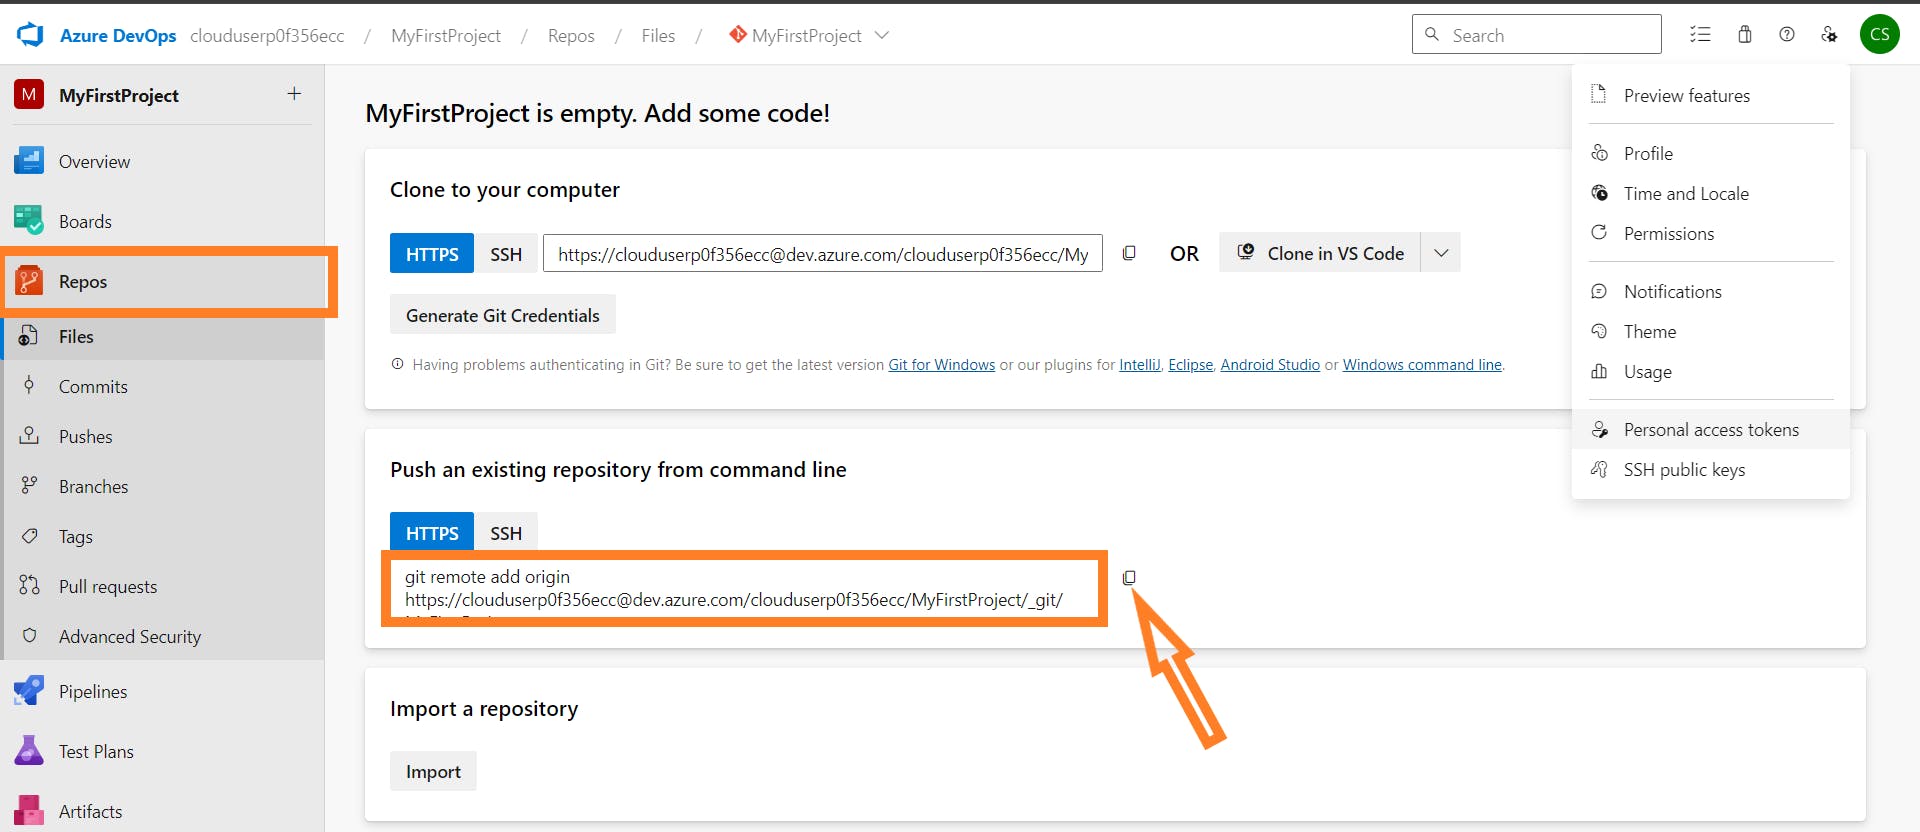
On Azure DevOps, go to Repos and copy the commands on "HTTPS".
Then run the commands.

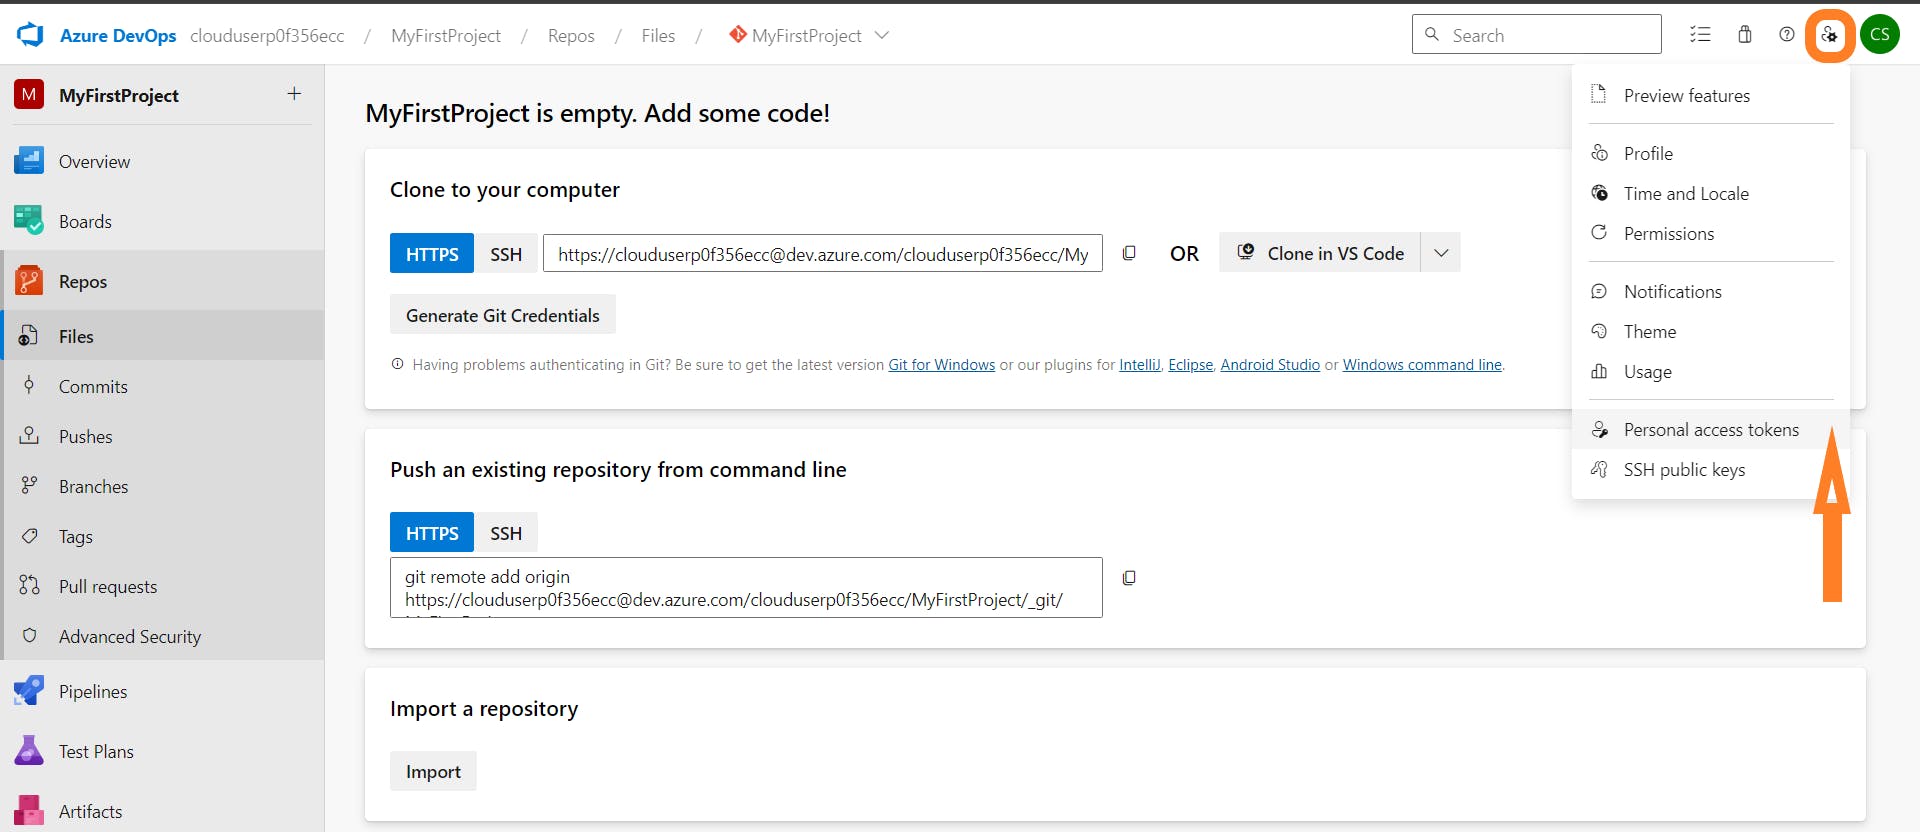
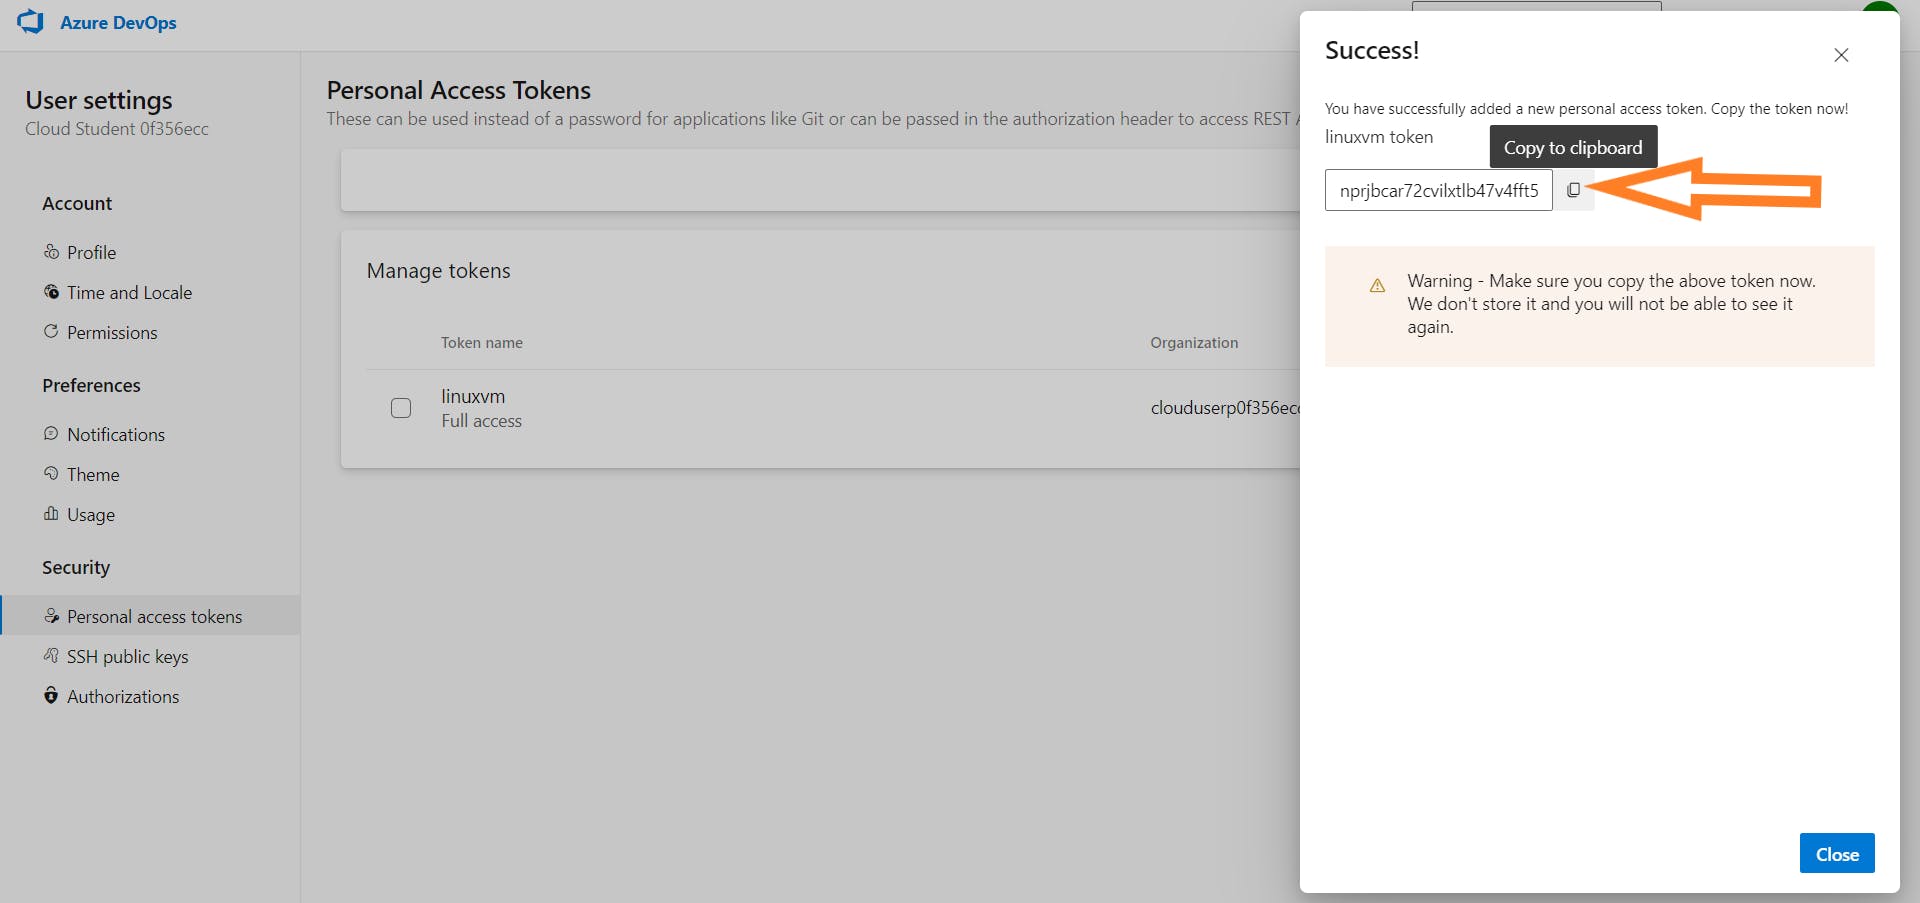
To get the password, we need to create a Personal Access Token.
First, click the profile settings at the top right, then select Personal Access Tokens.
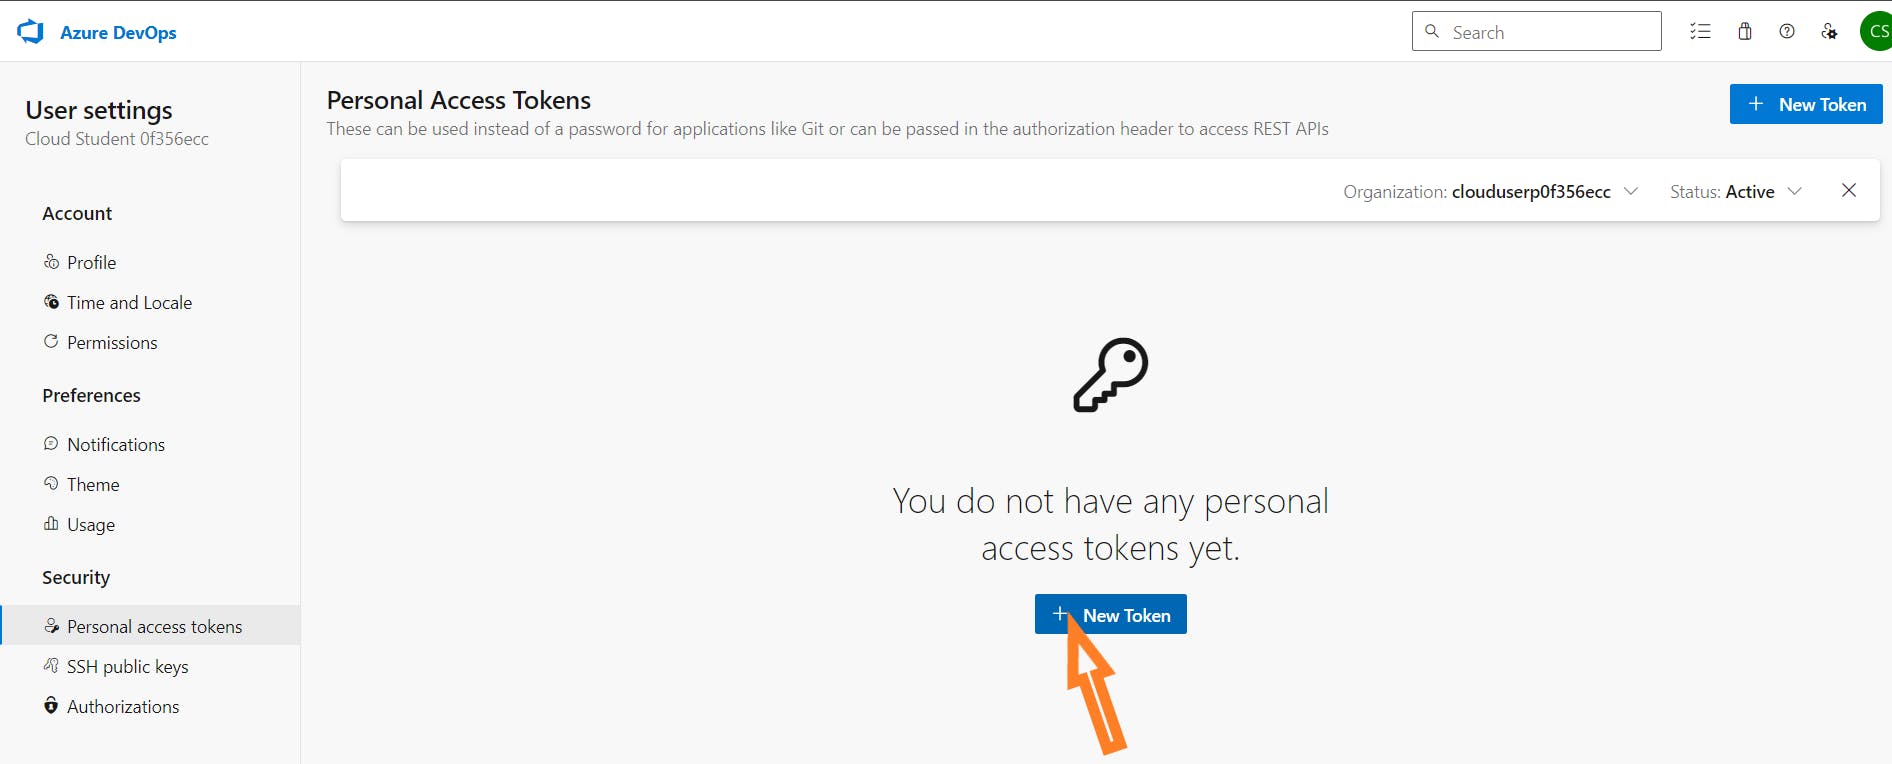
Next add a Token
Fill the form, select Full access, and click on create.
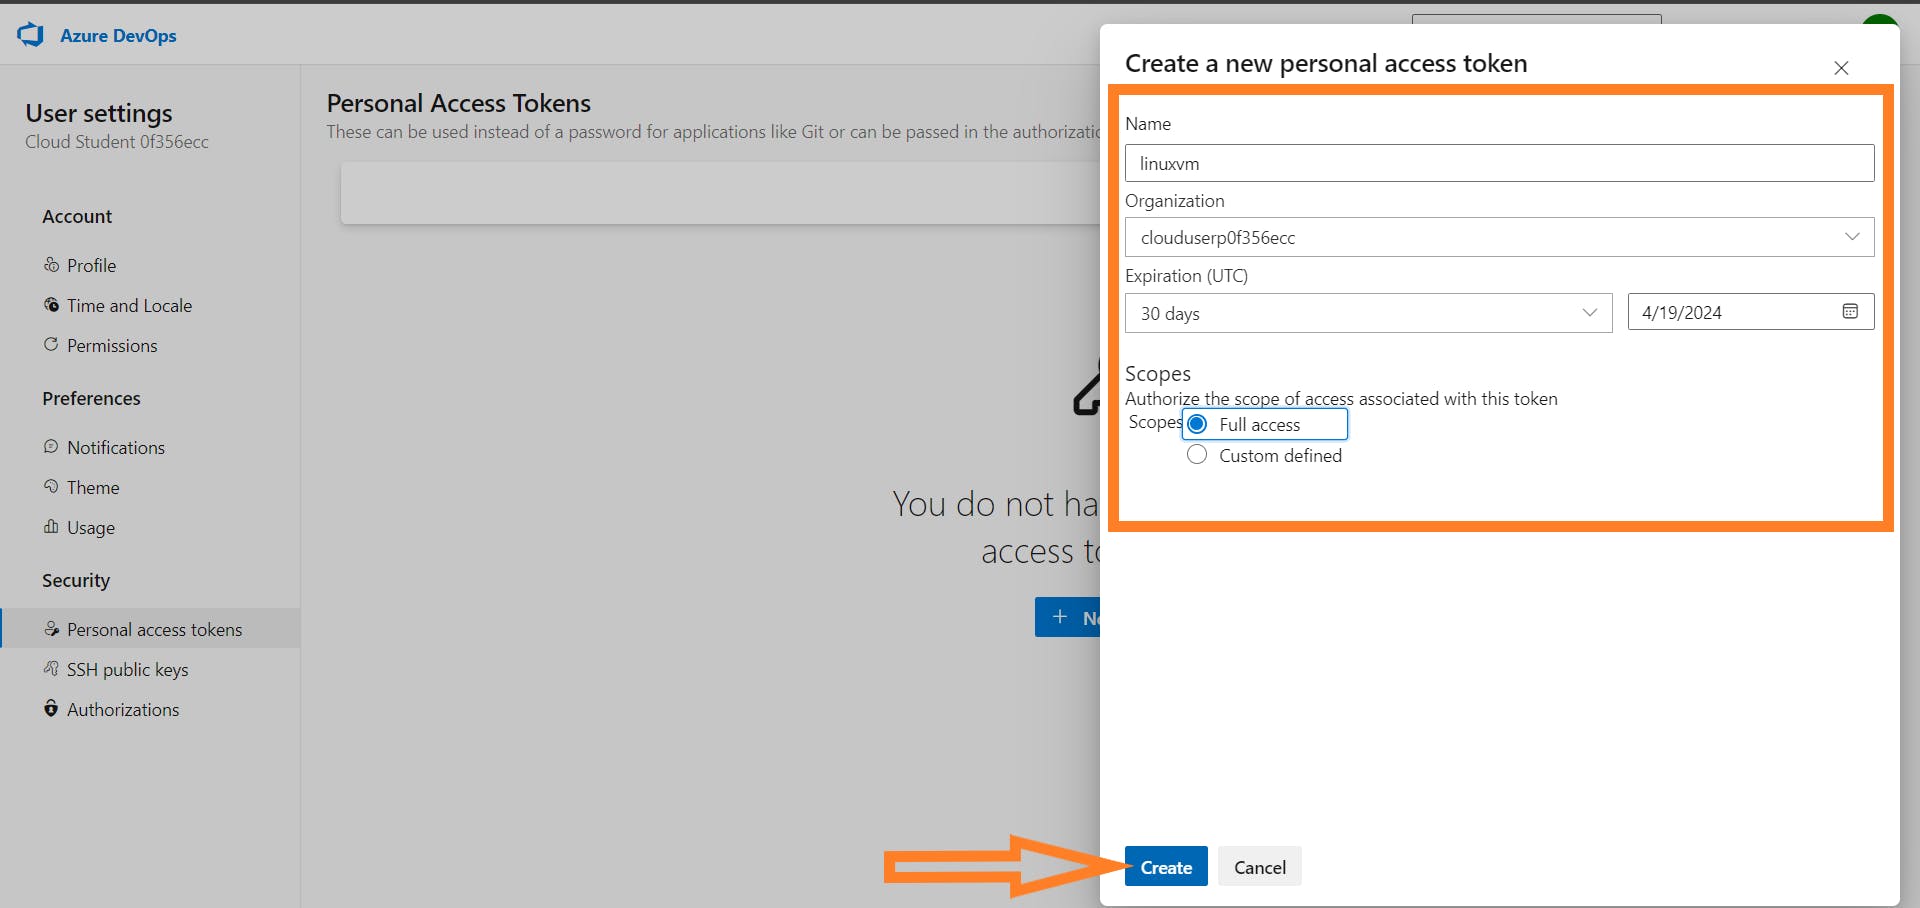
Now, copy the token and save somewhere, because you'll need it later.
Now paste the token as your password, then click enter.
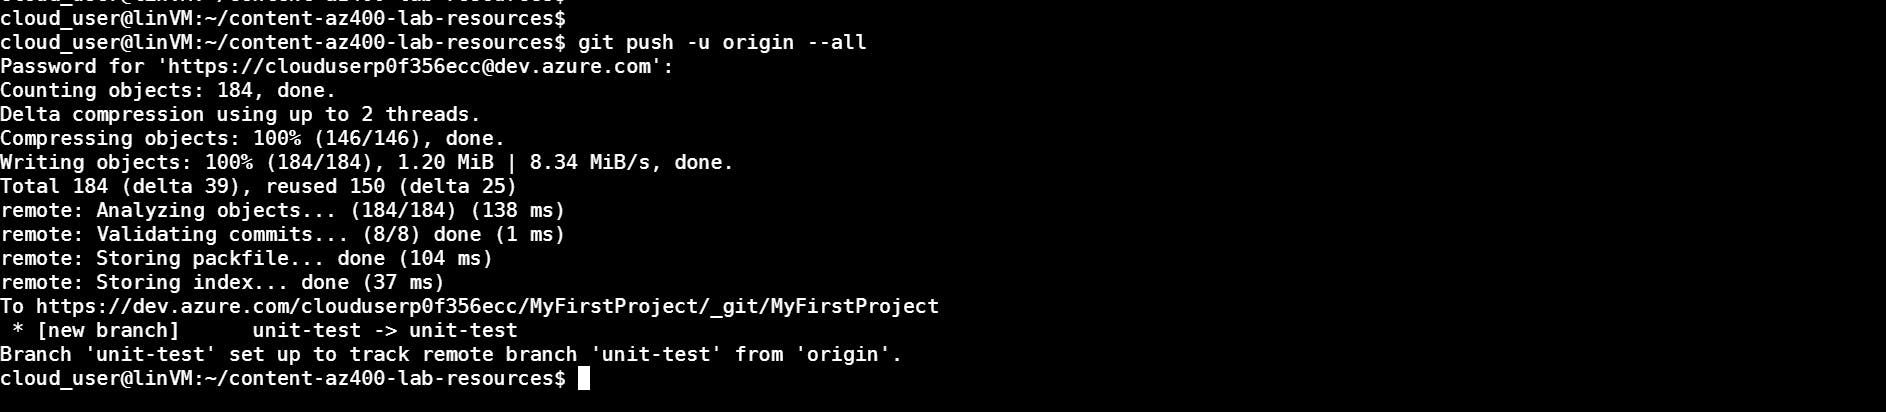
Now we have our files on Repos.

Step 3: Download Self-Hosted Agent
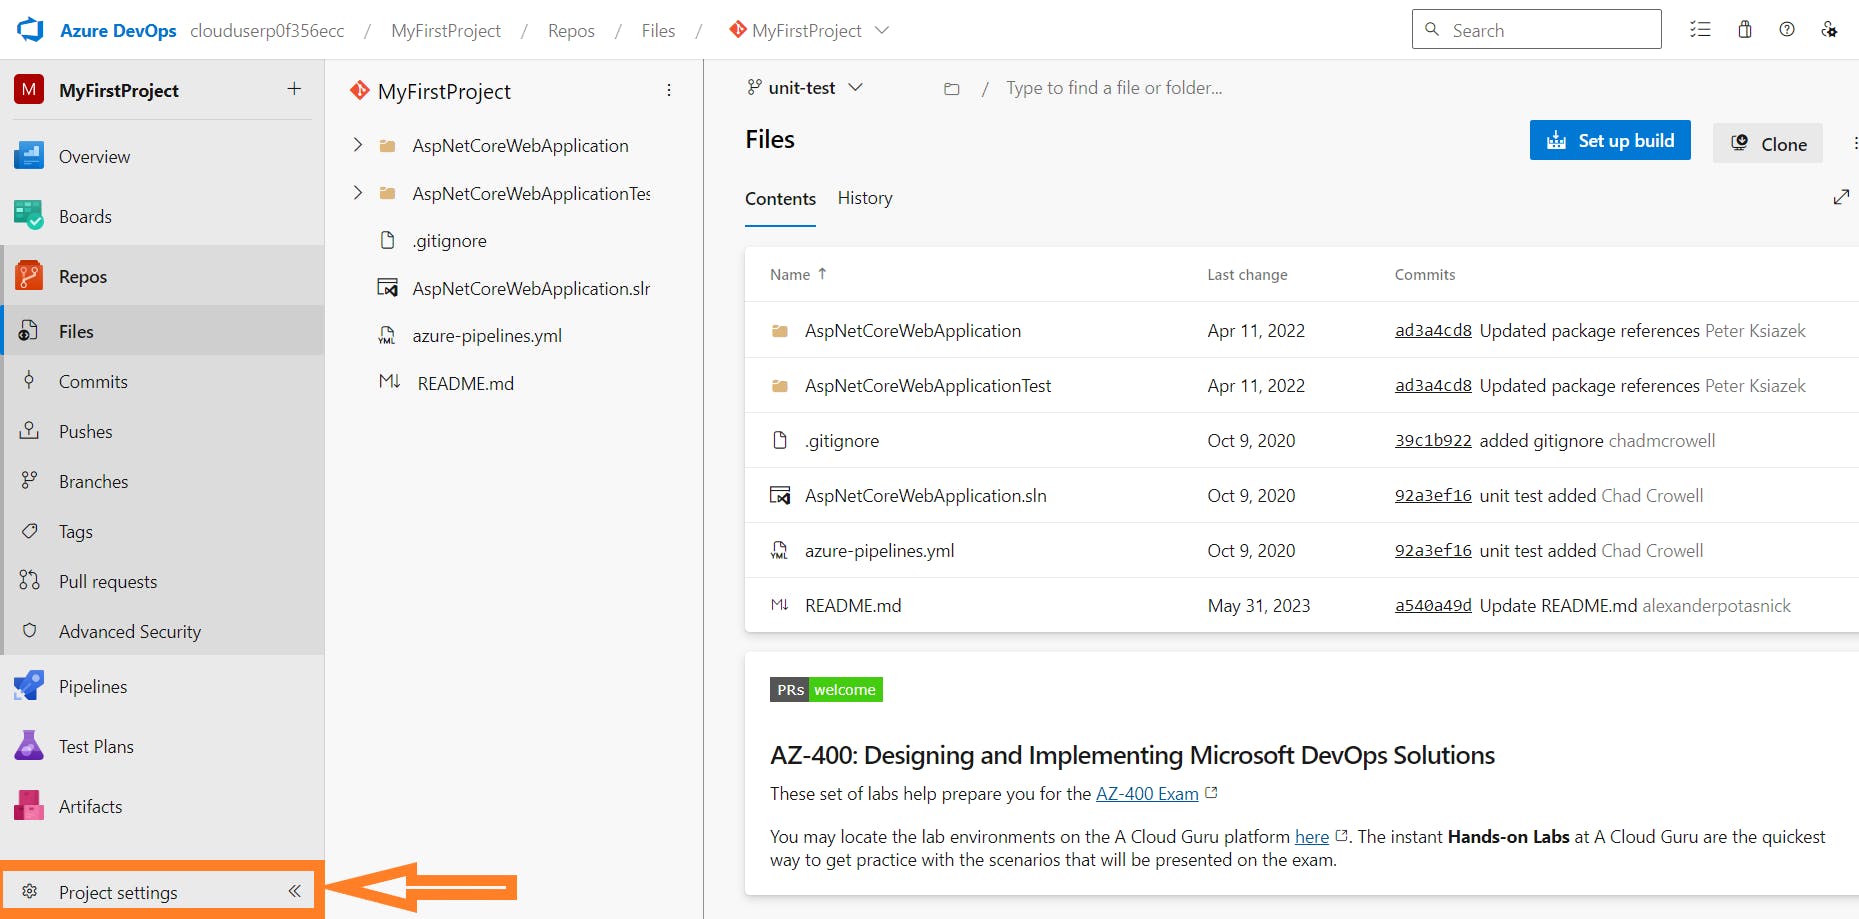
At the top of the page, click the Azure DevOps icon, then select the project.
On the bottom left, click Project settings.
Scroll down the left-hand pane and under Pipelines, select Agent pools.
Select the Default pool.

Click New agent.

Select the Linux tab.
Click the Copy icon, next to Download to copy the agent URL to your clipboard.
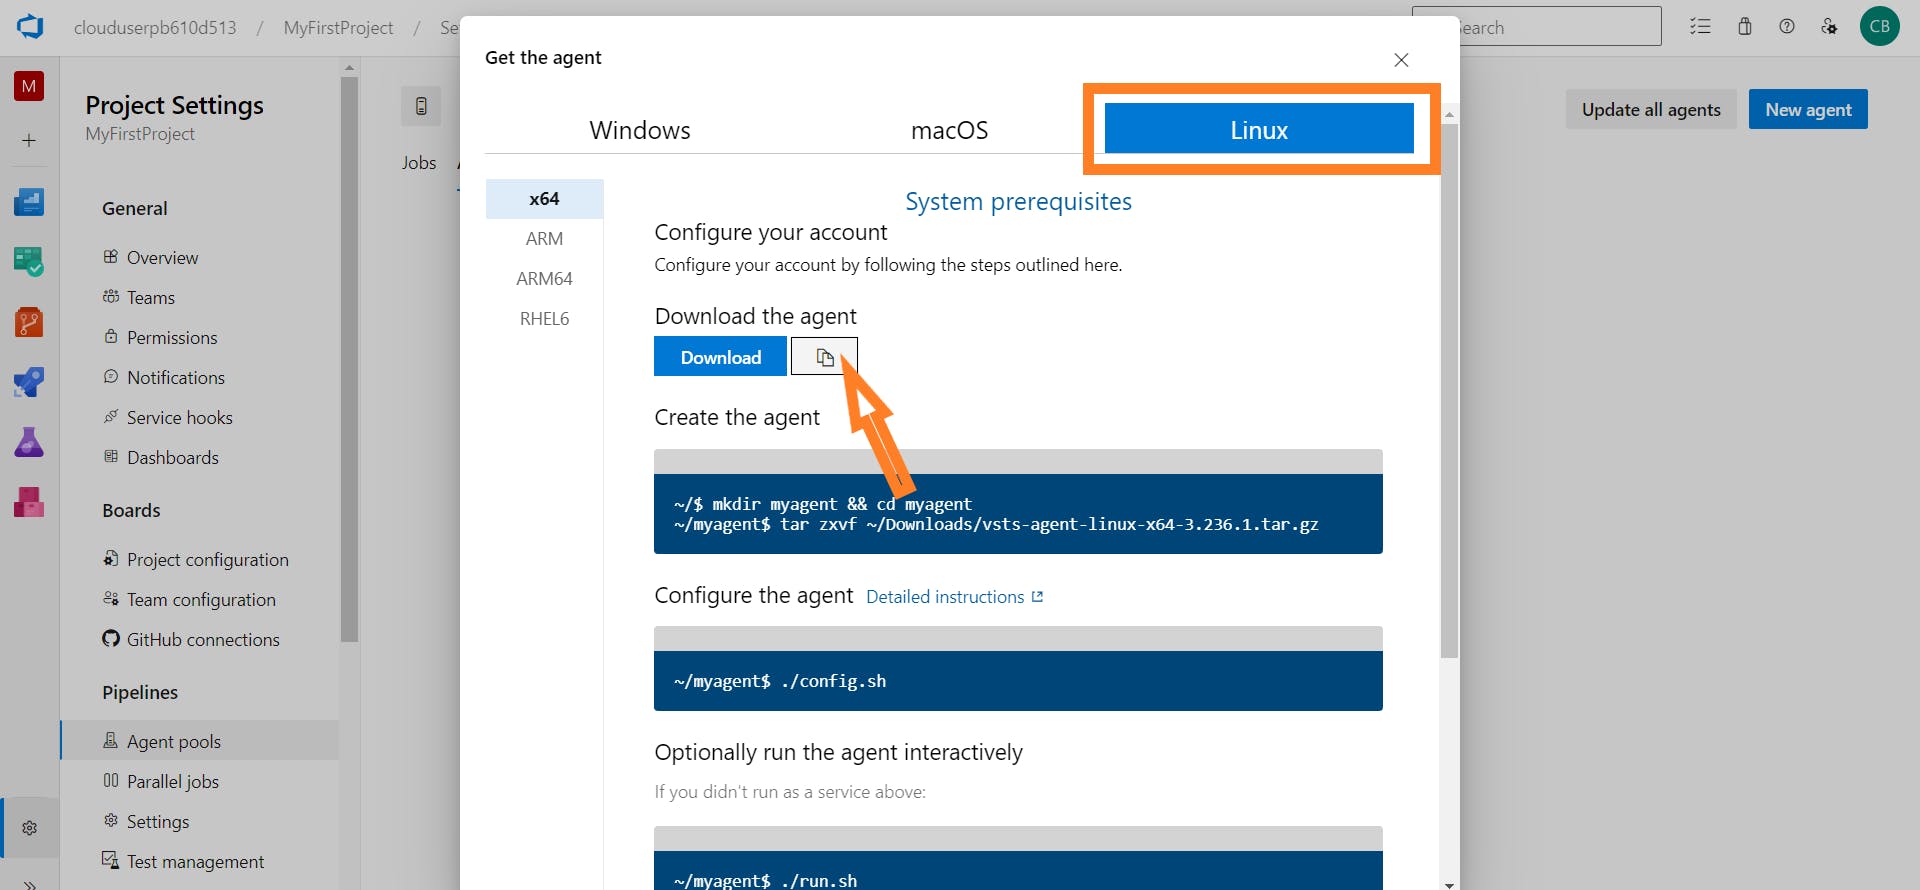
Paste it to a text file to use in the following steps. Keep this tab and popup open.
Go back to the Linux VM, and change directory to the root:
cd ~Make and navigate to a new directory called Downloads:
mkdir Downloads && cd DownloadsRun wget against the agent URL you just copied:
wgethttps://vstsagentpackage.azureedge.net/agent/3.236.1/vsts-agent-linux-x64-3.236.1.tar.gz
Navigate back to the root -
cd ~Create and navigate to another directory called myagent:
mkdir myagent && cd myagentUnzip the package you just downloaded. You can copy this same command from the popup in Azure DevOps to get the full package and version number:
tar zxvf -/Downloads/vsts-agent-linux-x64-3.236.1.tar.gz
Review the contents of the directory (ls). Observe all of the files and folders for the agent.

Configure the Agent. Run the configuration script:
./config.shType y to accept the license agreement.
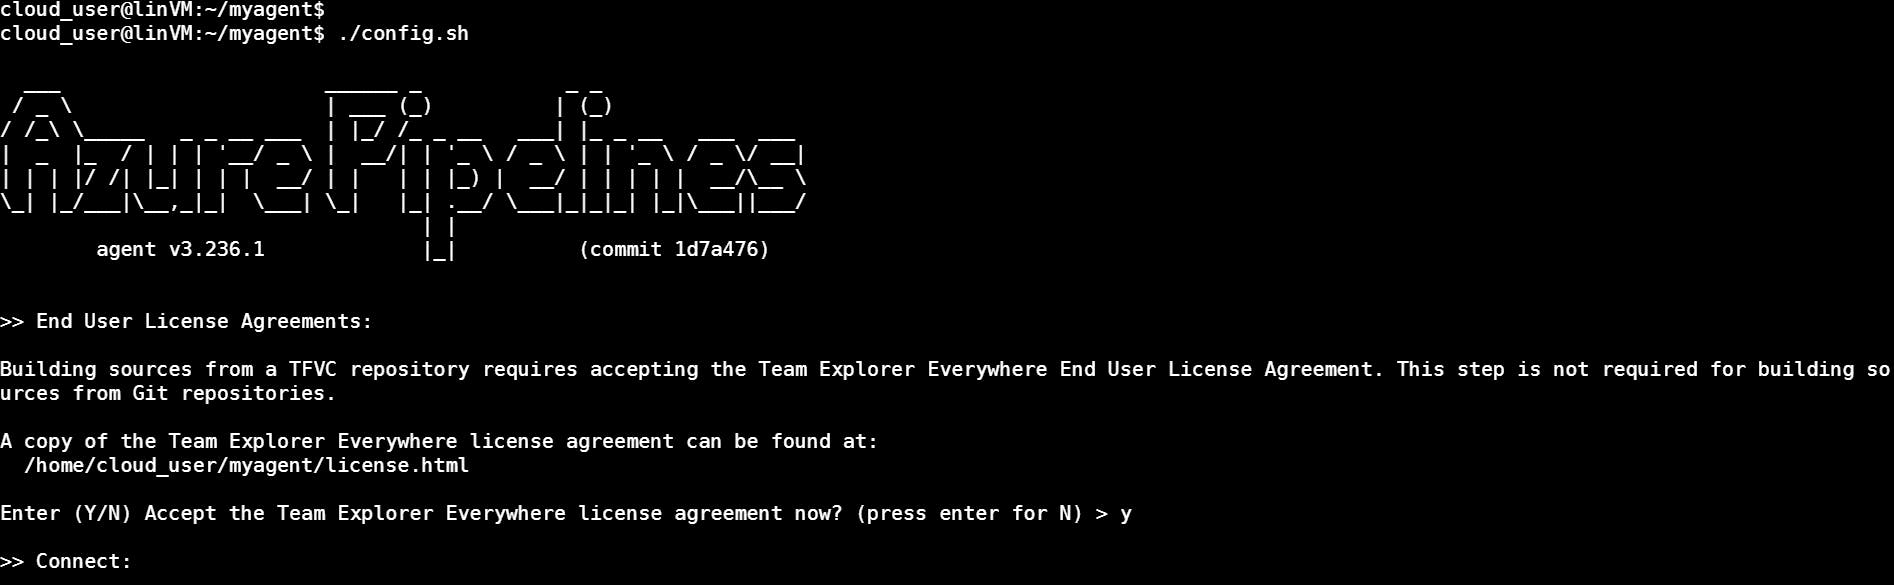
When prompted for your server URL, go back to Azure DevOps and grab the URL from your browser. It will look something like https://dev.azure.com/clouduser..., followed by some numbers (i.e., copy everything up to and not including /MyFirstProject). Paste this in the terminal.

Press Enter to accept the default authentication type of PAT.
For personal access token, copy and paste the personal access token you created and saved earlier in this lab.
Press Enter to accept the default agent pool.
Press Enter to accept the default name.
Press Enter to accept the default work folder.
Run the agent interactively so that it is always listening for any jobs:
./run.sh
Step 4: Create the new Pipeline
Return to Azure DevOps, close the agent configuration box, and click the breadcrumb for MyFirstProject near the top of the screen.
In the left navigation, click Pipelines.
Click Create Pipeline.

Click Use the classic editor.
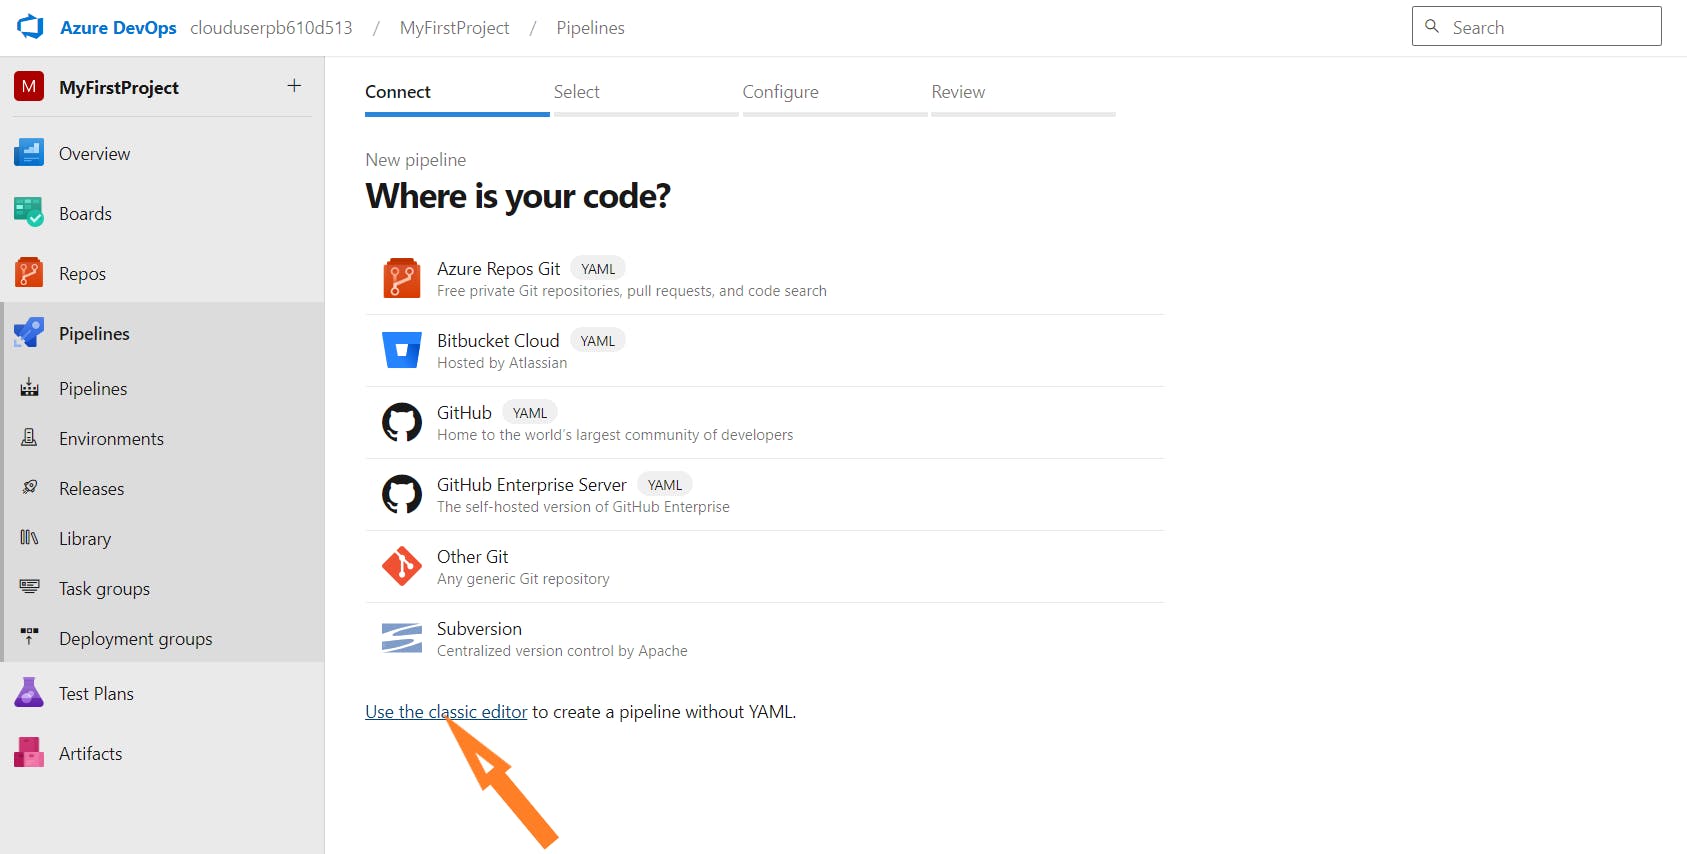
Under Select a source, select Azure Repos Git and make the following selections:
Team project: MyFirstProject Repository: MyFirstProject Default branch: unit-test Click Continue.

Scroll down and select the ASP.NET Core template.
Click Apply.

On the right panel, for Agent pool, select Default.
For Project(s) to test, enter: /[Tt]est/.csproj.

Next to Agent job 1, click the + icon to add a new task.
Search for and click Add for the Use .NET Core task.
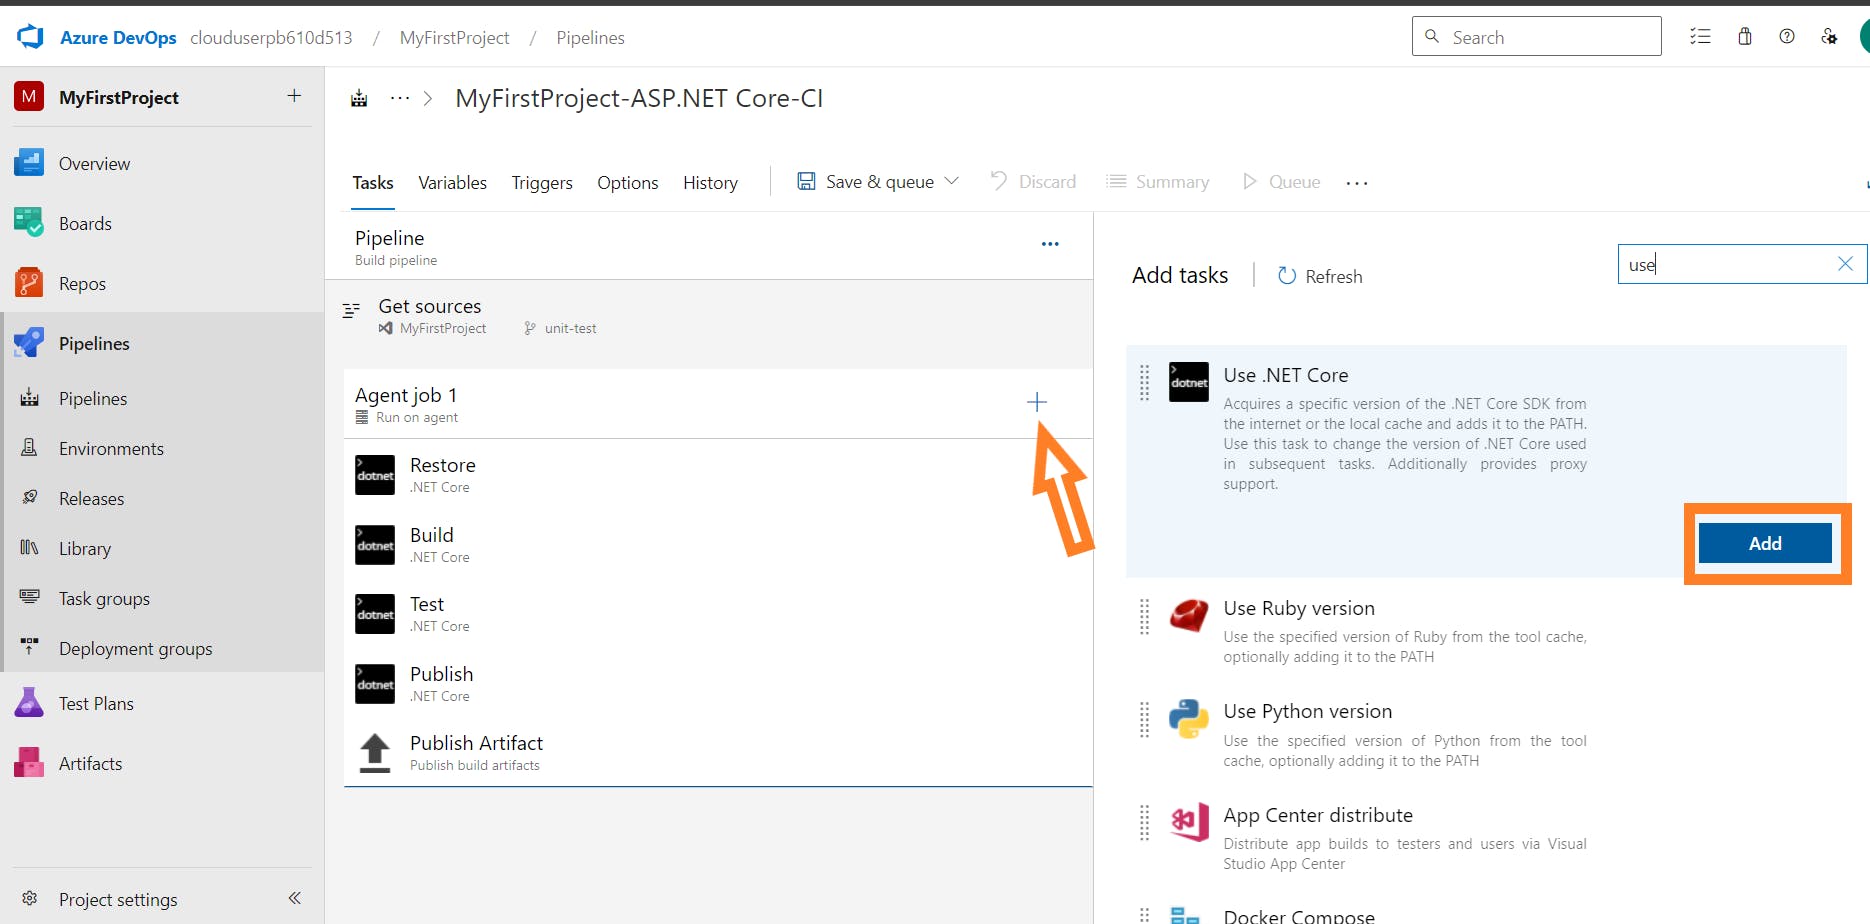
In the task list for Agent job 1, drag and move the Use .NET Core task to the top.

With the Use .NET Core task still selected, change the Version on the right to 3.1.x.

At the top, click Save & queue > Save > Save.

Select the Triggers tab, and check the box for Enable continuous integration on the right panel.

At the top, click Save & queue > Save > Save.
Update the Branch On the left menu, select Repos.
Select the AspNetCoreWebApplication folder on the right.
Navigate through the folders to Views > Home.
Open the Index.cshtml file.
To the right of the code pane, click Edit.
Make a minor change in the heading.
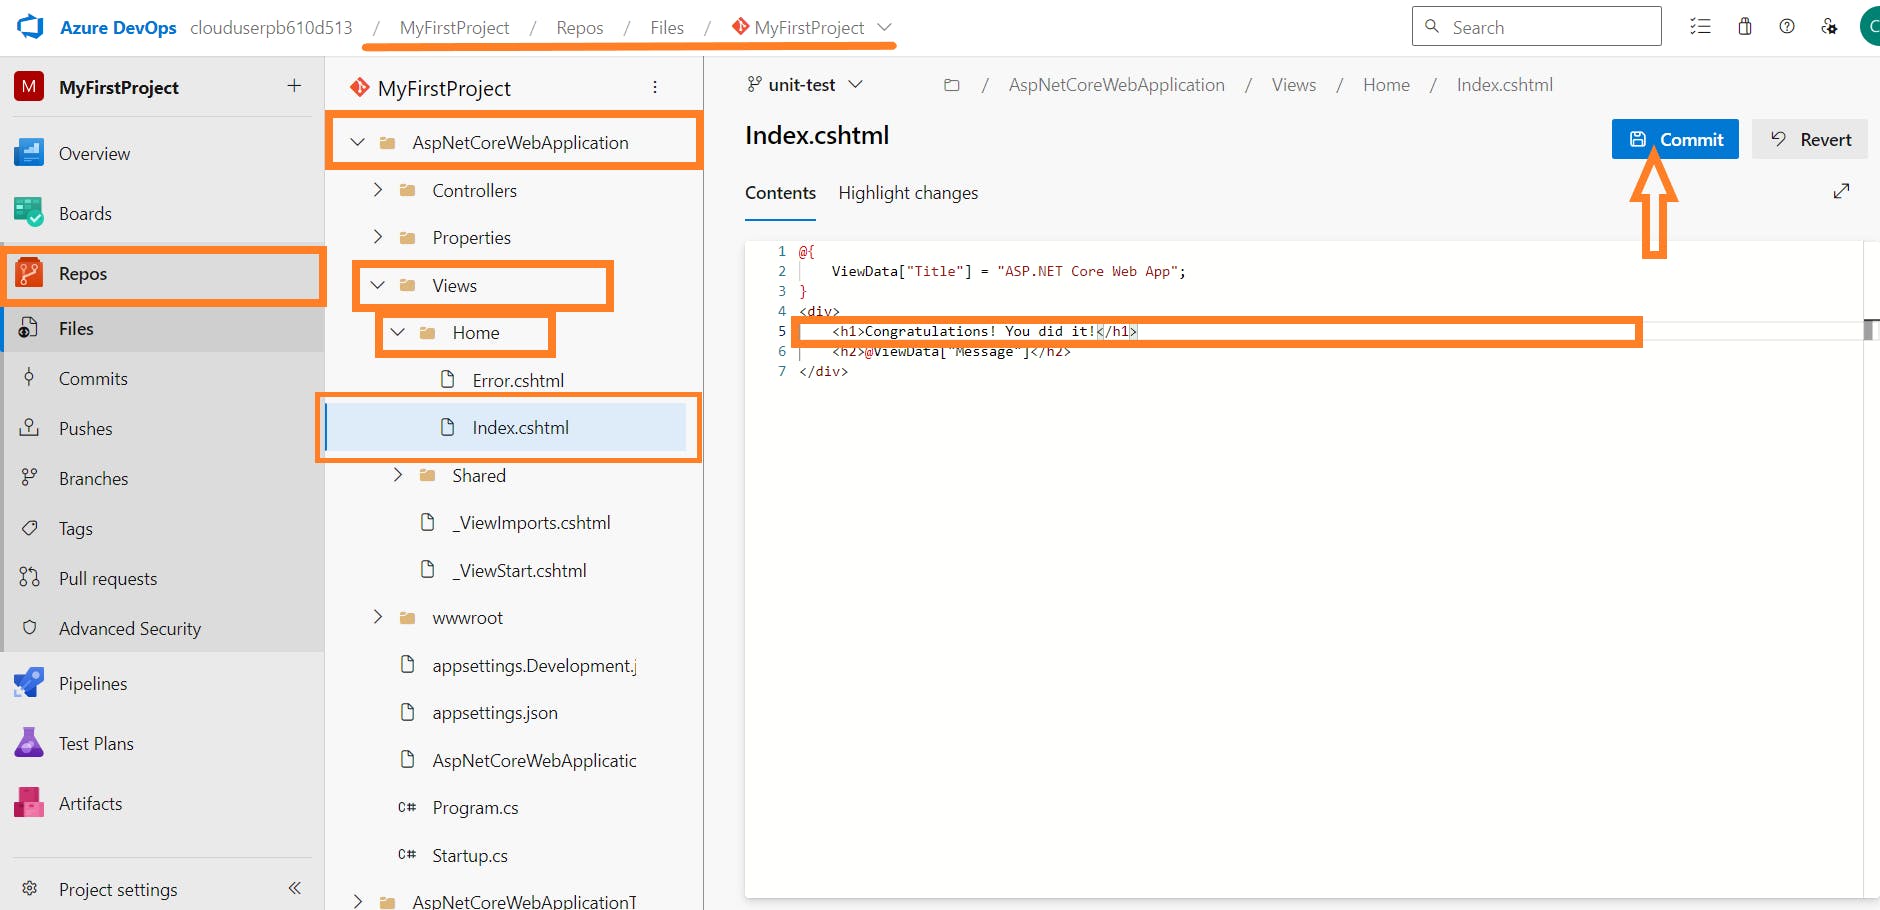
- At the top, click Commit > Commit.
Run the Pipeline and Verify Success From the left navigation menu, select Pipelines.

Select the pipeline shown to open it. Then, select the currently running job.

Select Agent job 1 to view the progress. It will take a few minutes for the job to complete.

Once complete, click the back arrow above the job progress.
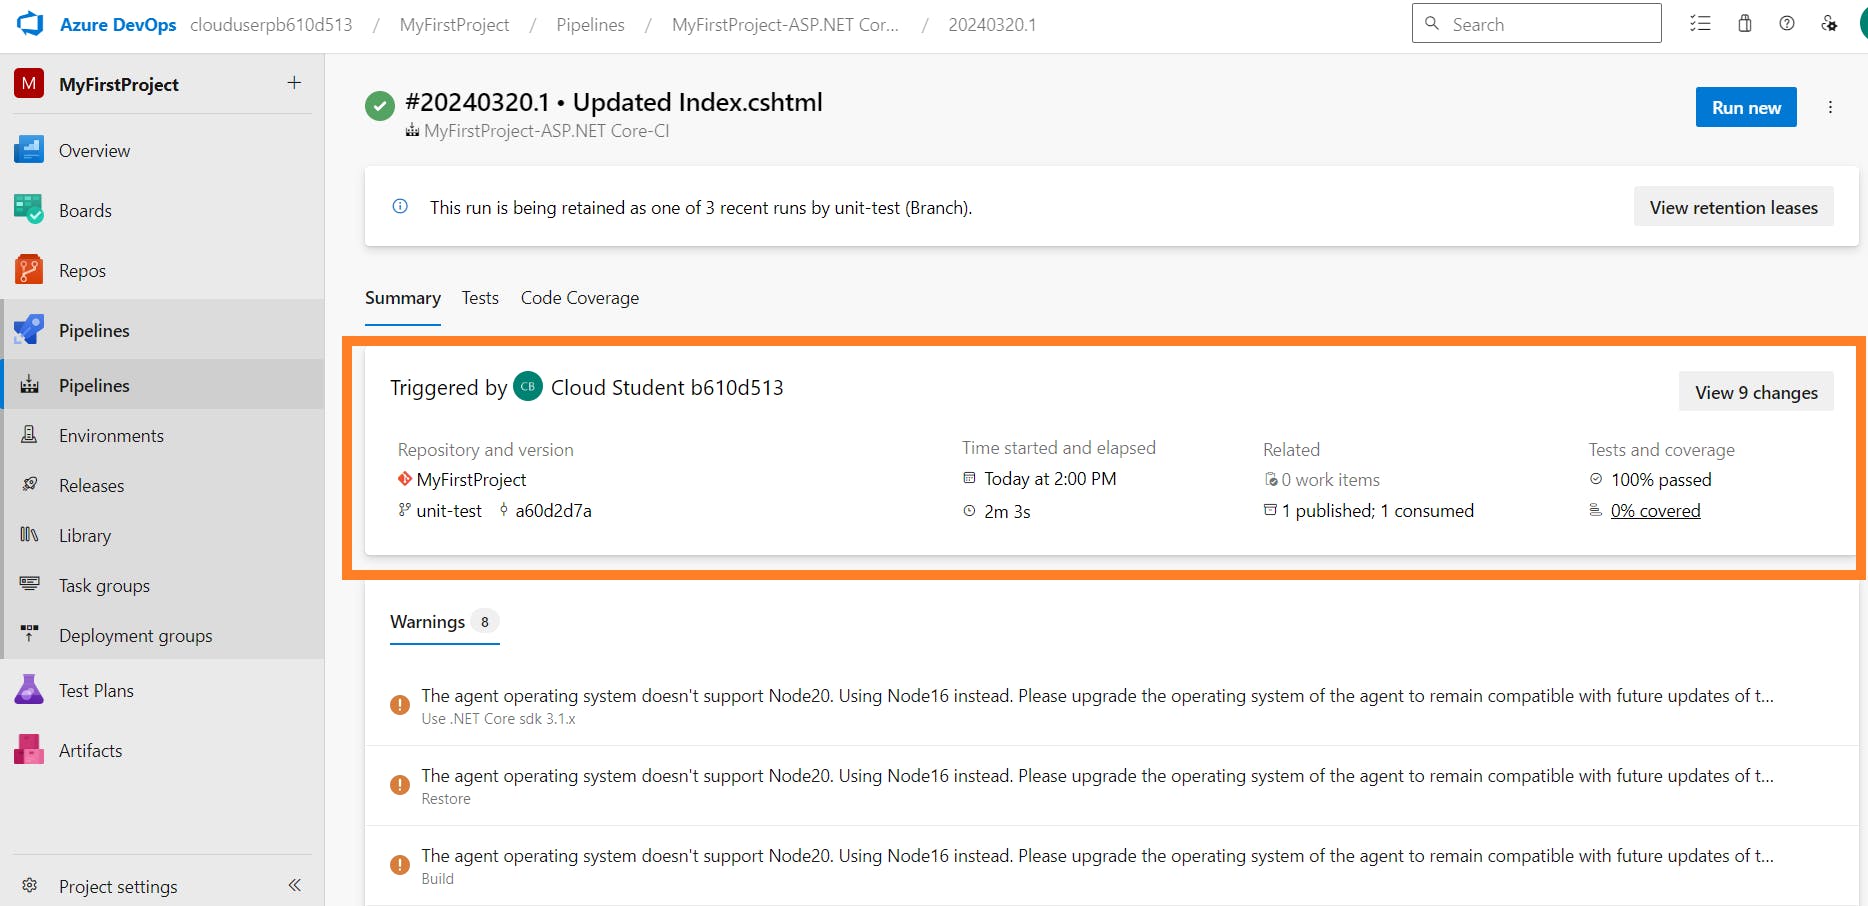
Select the Tests tab to verify success.


Conclusion
Congratulations! You've successfully completed this hands-on lab, creating and testing an ASP.NET Core application using Azure Pipelines. This experience has equipped you with valuable skills in automating build and test processes within Azure DevOps, essential for modern software development workflows.