Efficient Virtual Machine Deployment with Azure CLI and ARM Templates: A Step-by-Step Guide

I am passionate about all things tech, and I'm always learning new skills and technologies to stay on top of the latest trends.
I'm also a team player who loves collaborating with others to create innovative solutions.
In my free time, I enjoy coding, creating tech blogs, and seeing movies. I'm always up for a challenge and I'm excited to see what the future holds.
Introduction:
Azure Command-Line Interface (Azure CLI) is a powerful tool that facilitates the management of Azure resources directly from the command line. In this article, we will explore how to create a virtual machine (VM) in a resource group using Azure CLI, download the template of the resource group, and then deploy it to another resource group. This process can save time and ensure consistency in your Azure infrastructure deployment.
Step 1: Install Azure CLI
Before getting started, ensure that you have Azure CLI installed on your machine. If you need help on installation, click here.
Step 2: Log in to Azure
Open a command prompt or terminal window and log in to your Azure account using the following command:
az login
This command will prompt you to open a URL in your web browser, where you can authenticate and authorize the Azure CLI to access your Azure account.

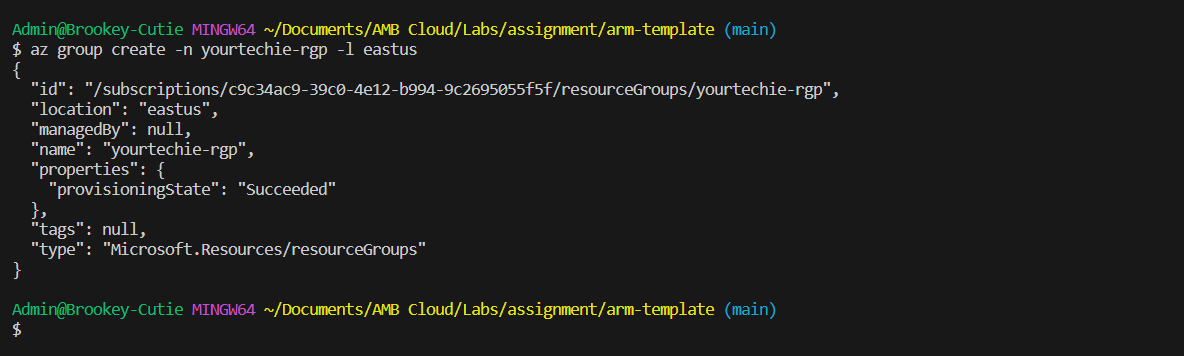
Step 3: Create a Resource Group
Now, let's create a resource group. Replace <resource-group-name>, <vm-name>, <location>, <image> and <username> with your desired values:
az group create --name <resource-group-name> --location <location>
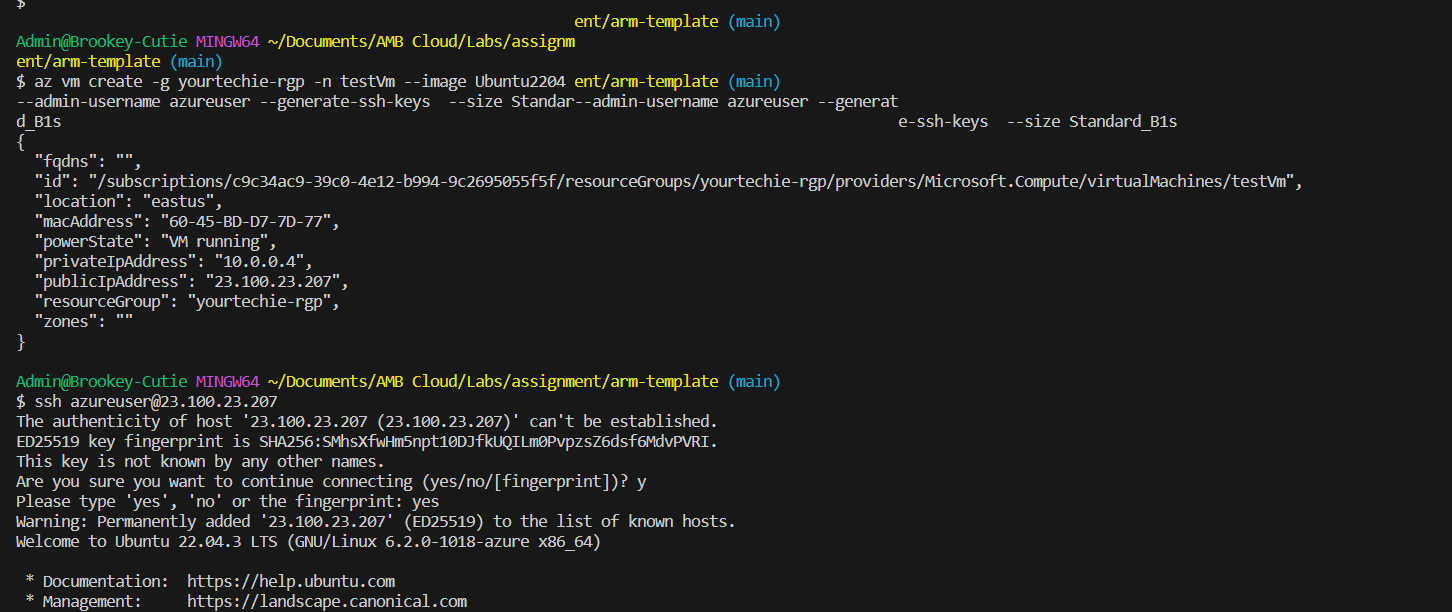
Step 4: Create a Virtual Machine in a Resource Group
Now, let's create a virtual machine in a specified resource group. Replace <resource-group-name>, <vm-name>, <location>, <image> and <username> with your desired values:
az vm create --resource-group <resource-group-name> --name <vm-name> --image <image> --admin-username <username> --generate-ssh-keys --size Standard_B1s
Step 5: Download Resource Group Template
Once the VM is created, you can download the template of the resource group using the following command:
az group export --resource-group <resource-group-name> --template-file simpletemplate.json
This command exports the template to a file named simpletemplate.json. You can choose a different name if needed.

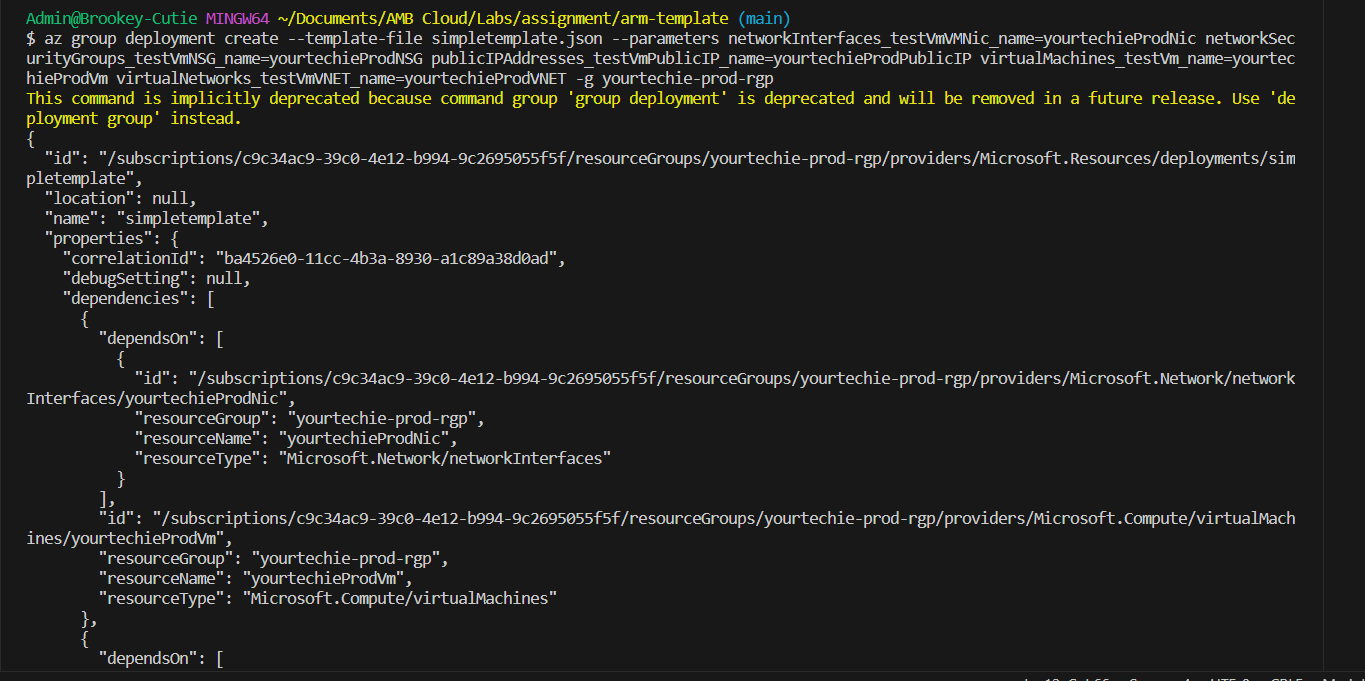
Step 6: Deploy the Template to Another Resource Group
Now, let's deploy the exported template to another resource group. Replace <new-resource-group> with the name of your target resource group:
az group create --name <new-resource-group> --location <location>
az deployment group create --resource-group <new-resource-group> --template-file azuredeploy.json
This set of commands creates a new resource group and deploys the exported template to it.
Errors:
The error below occurred at step 4; the stage of creating the VM

The error below occurred at step 6; the stage of deploying the ARM template to another resource group.

Solutions:
The solution to the error at Step 4 was deleting some VMs I had created because according to my subscription, three was the maximum VMs that can be created.
The solution to the error at Step 6 was me remodifying the simpletemplate.json file as follows:
I deleted line 135 -> "requireGuestProvisionSignal": true,
and also deleted the Managed disk id on line 160 ->
"id": "[resourceId('Microsoft.Compute/disks', concat(parameters('virtualMachines_testVm_name'), '_disk1_939d66973e0d4b49b4bcf25131e2460d'))]",
Checks:
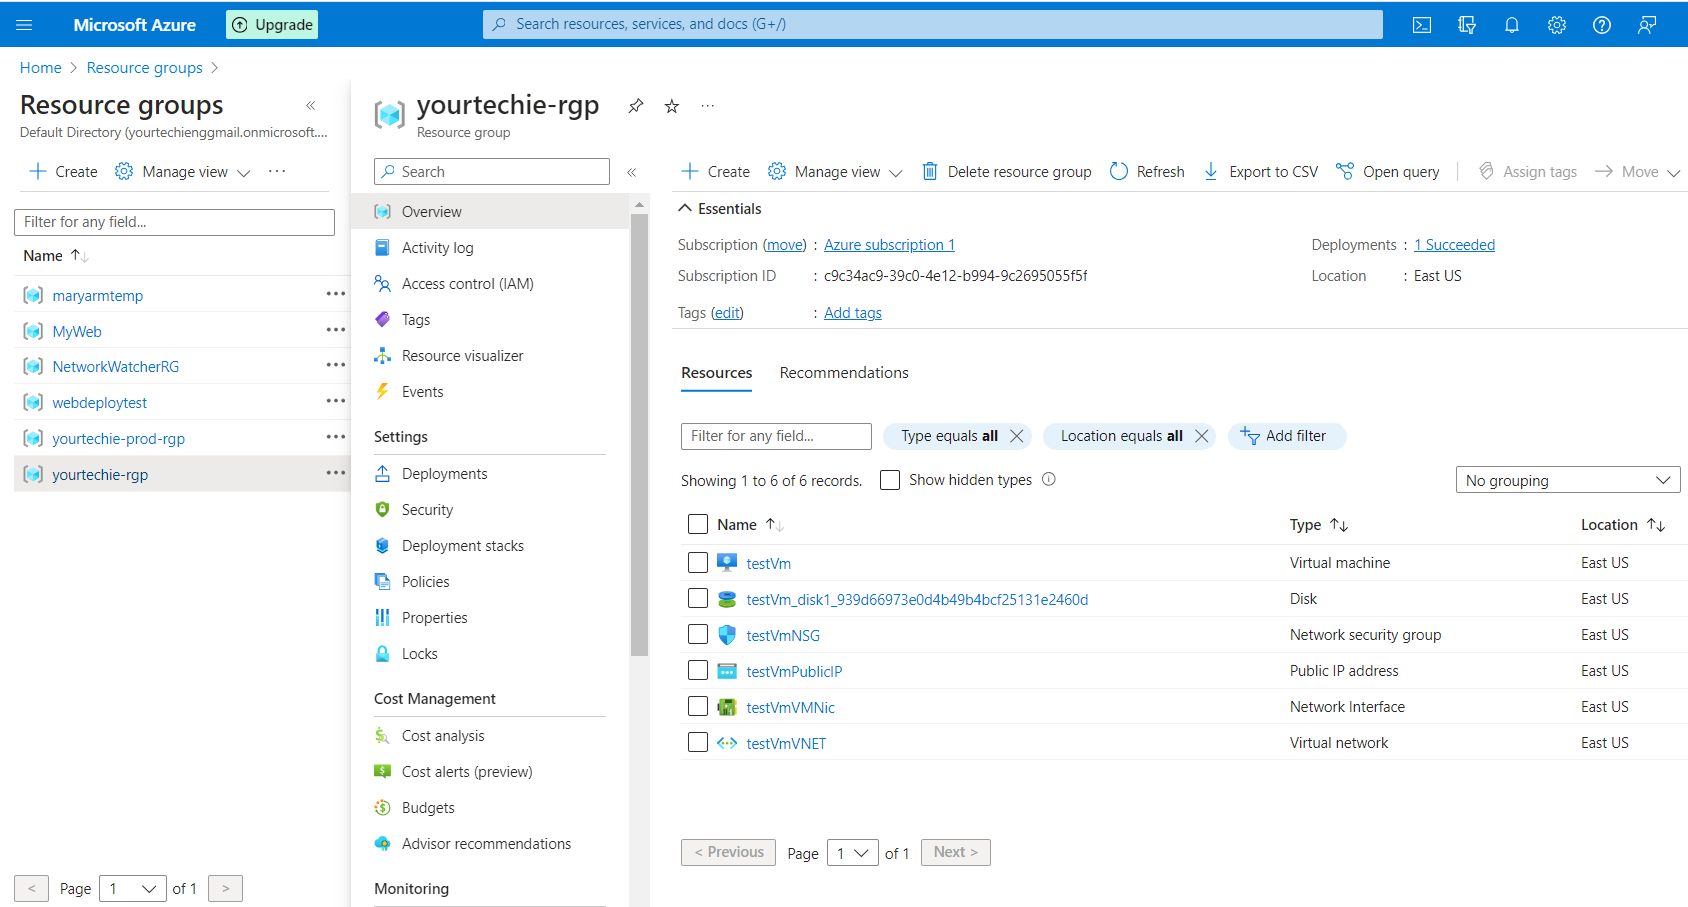
Let's check the Azure Portal to verify if all our commands worked.
Here's the first resource group "yourtechie-rgp" we created. Here we created the VM and exported the simpletemplate.json file.
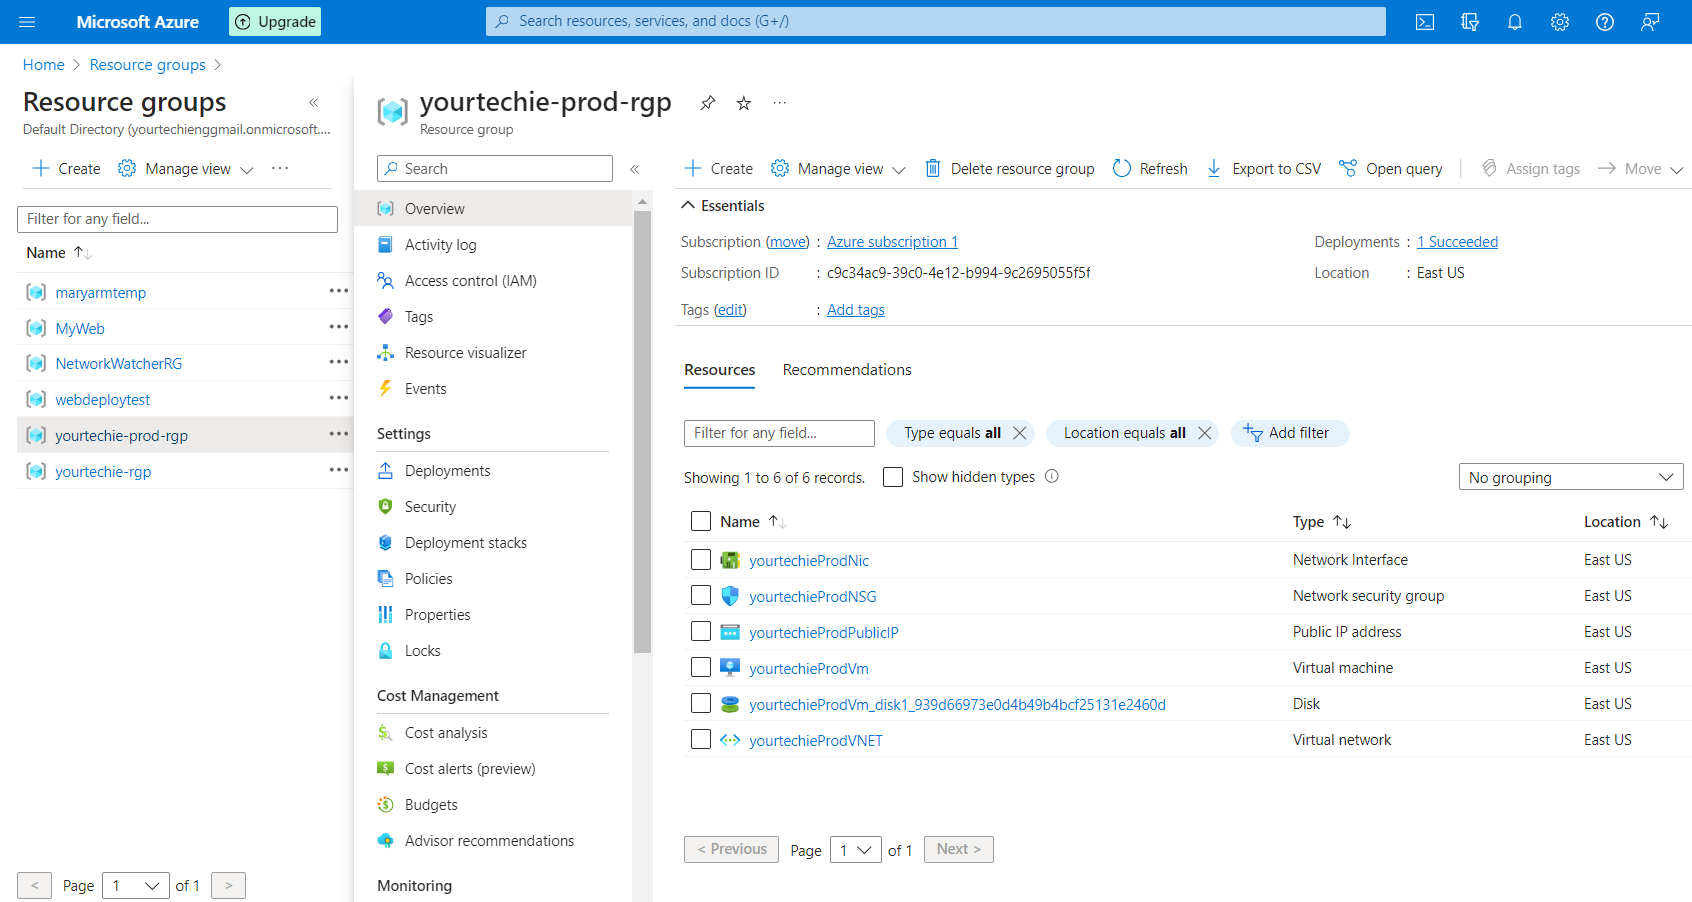
Here's the second resource group "yourtechie-prod-rgp", where we deployed the VM and it resources using the ARM template we exported.
Conclusion:
By following these steps, you can efficiently create a virtual machine in a resource group, export the resource group template, and deploy it to another resource group using Azure CLI. This process not only streamlines the deployment of Azure resources but also allows for easy replication and management of infrastructure across different environments. Azure CLI continues to be a valuable tool for automating tasks and enhancing the efficiency of Azure resource management.


