

Table of contents
- Step 1: Create an Azure Account
- Step 2: Create a Free App Service Plan
- Step 3: Create an Azure App Service
- Step 4: Push your Resume to Github
- Step 5: Deploy Your Resume
- Step 6: Access Your Resume
- Step 7: Custom Domain (Optional)
- Step 8: Secure Your Resume (Optional)
- Step 9: Monitoring and Scaling (Optional)
Hosting a resume on Azure App Services involves creating a web app and deploying your resume content.
In this blog, I'll be hosting a web app with PHP runtime.
Below are step-by-step instructions:
Step 1: Create an Azure Account
If you don't have an Azure account, sign up for one at Azure Portal.
Step 2: Create a Free App Service Plan
Navigate to the Azure Portal:
- Log in to the Azure Portal.
Create a New App Service Plan:
In the left-hand menu, click on "Create a resource."
Search for "App Service Plan" and select "App Service Plan" from the results.
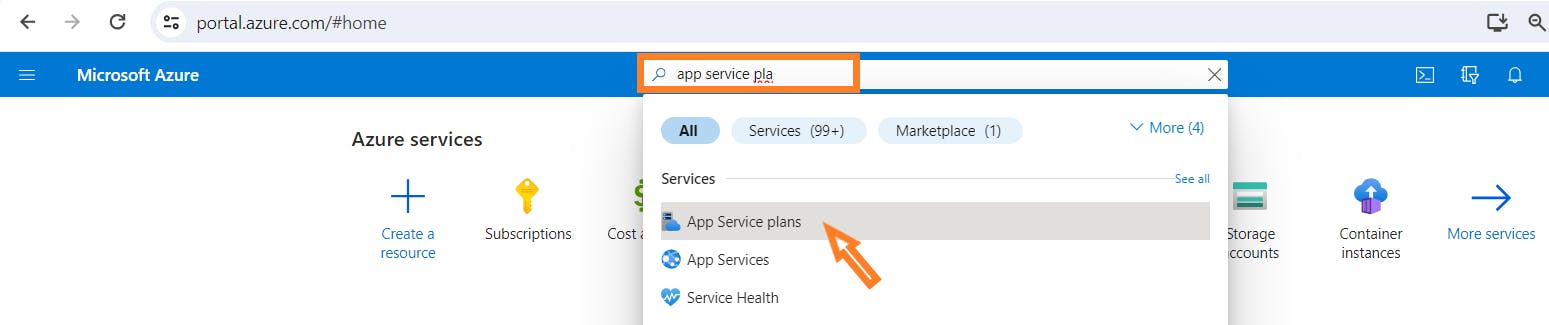
Click the "Create" button.
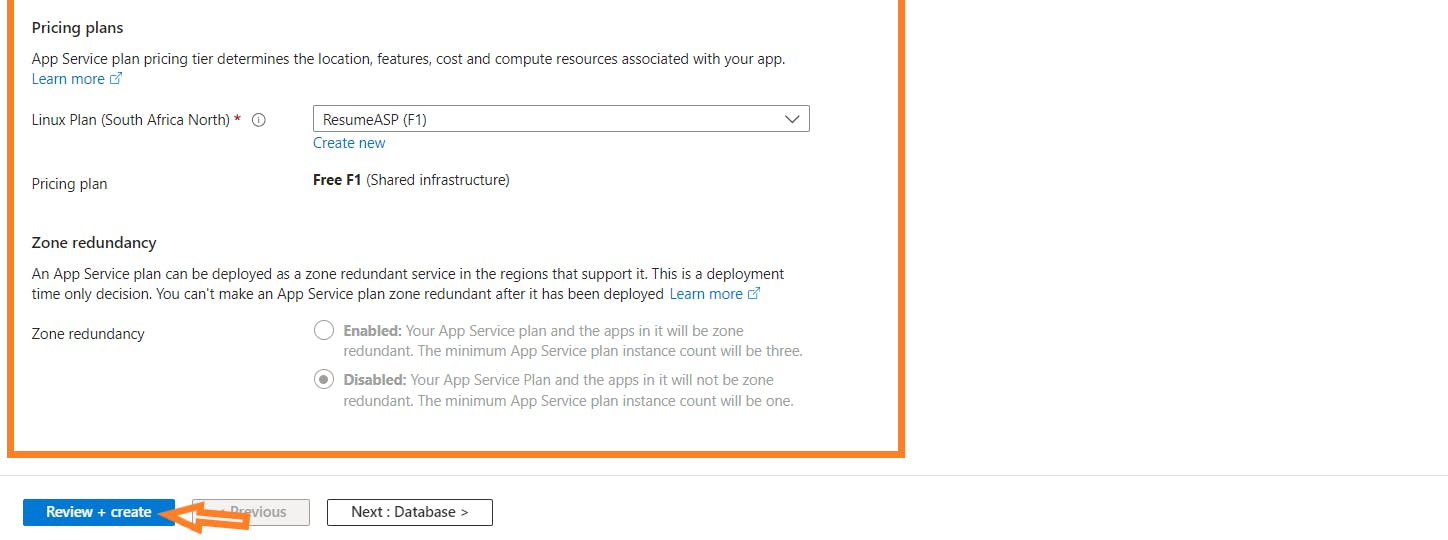
Configure App Service Plan:
Fill in the required details:
App Service plan: Choose a unique name.
Subscription: Select your subscription.
Resource group: Either create a new one or select an existing group.
Operating System: Choose Windows or Linux based on your preference.
Region: Choose a region close to your location.
SKU and Size: For a free tier, select the "Free" SKU.
Click "Review + create" and then "Create."

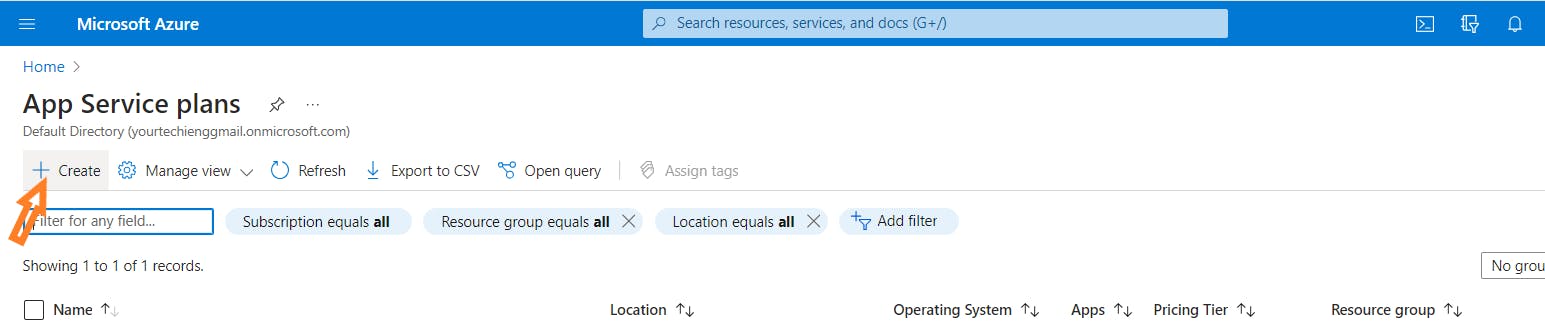
Wait for Deployment:
- Azure will deploy your App Service Plan. Wait for the deployment to complete.
Step 3: Create an Azure App Service
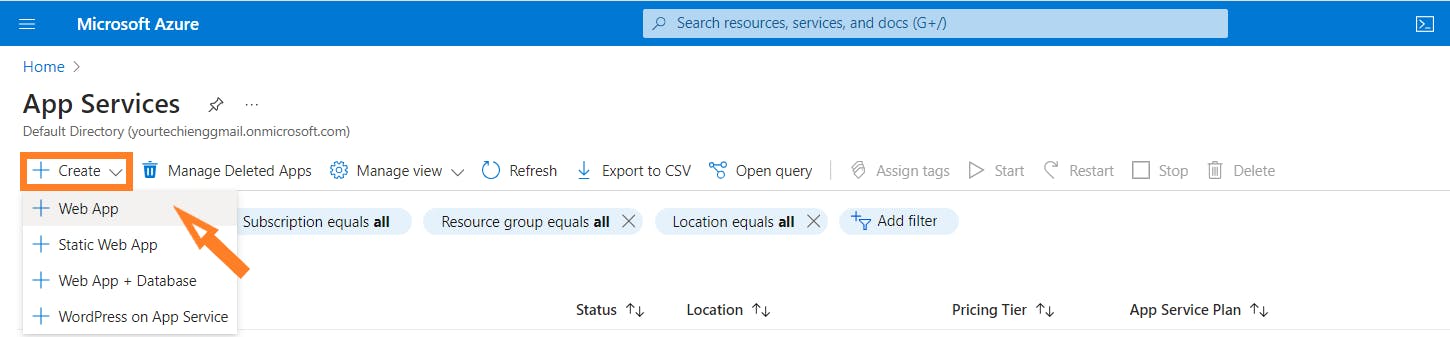
Navigate to the Azure Portal:
Search for "App Services" and select "App Services" from the results.
Click the "Create" button.
Then select "Web App" from the dropdown.
Configure Web App:
Fill in the required details:
App name: Choose a unique name for your web app.
Subscription: Select your subscription.
Resource group: Use the same group as your App Service Plan.
OS: Choose the same OS you selected for the App Service Plan.
App Service Plan: Choose the App Service Plan you created.
Runtime stack: Choose the runtime stack that fits your needs (e.g., Node.js, Python).
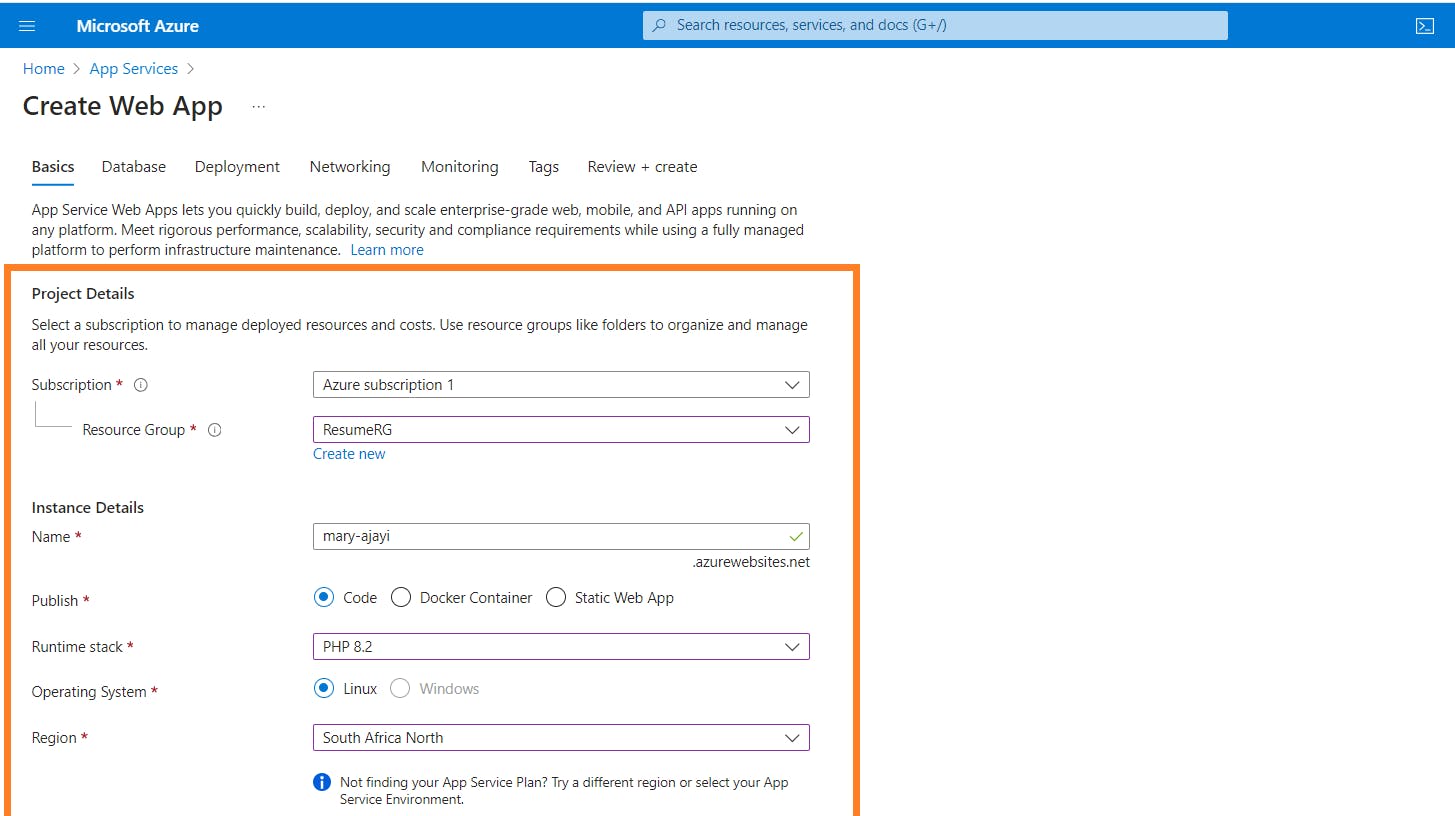
Click "Review + create" and then "Create."
Wait for Deployment:
- Azure will deploy your web app. Wait for the deployment to complete.
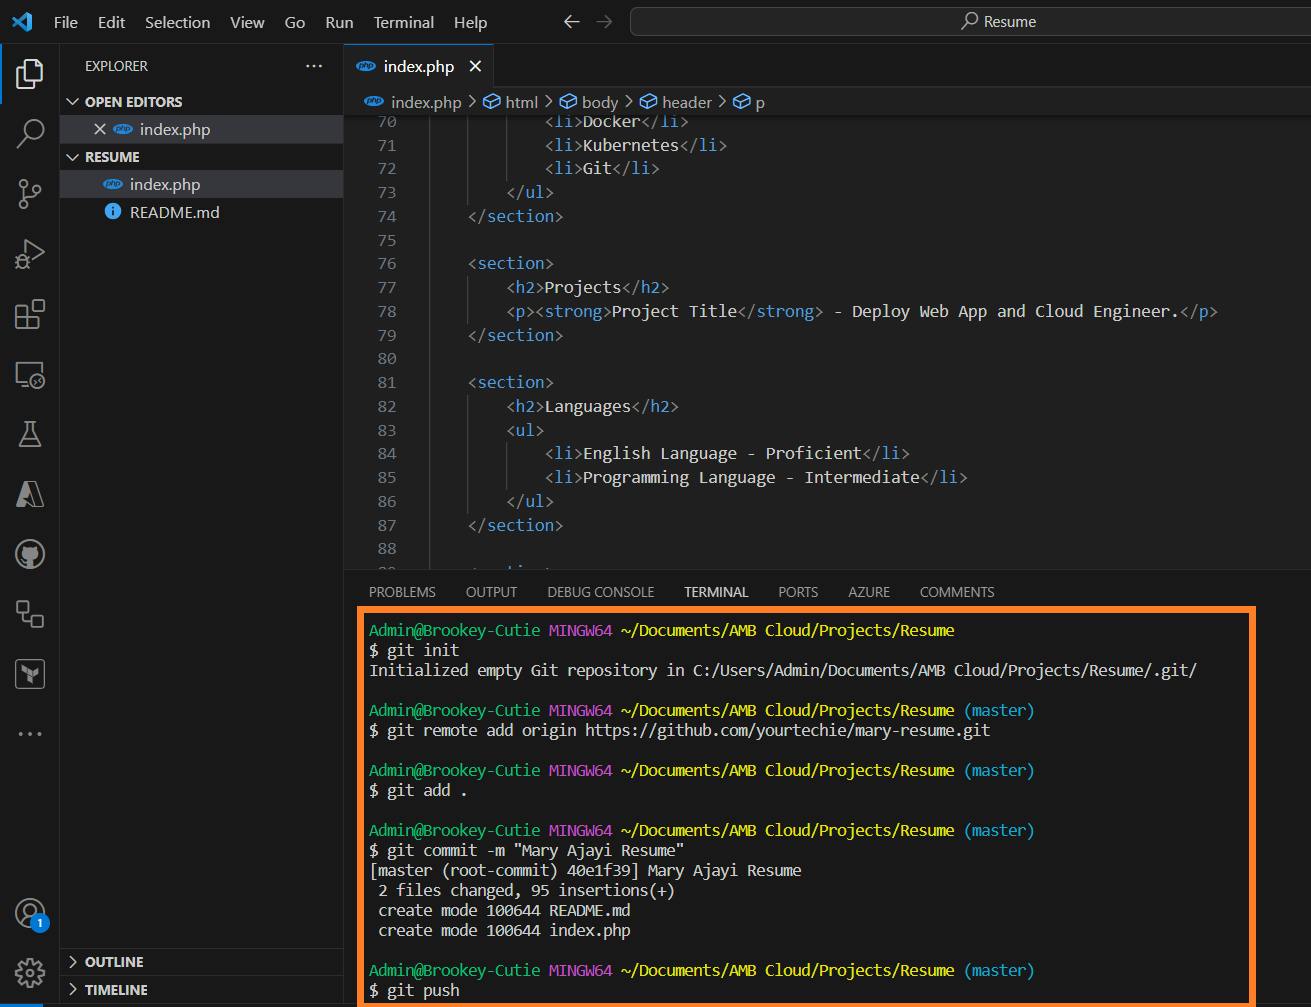
Step 4: Push your Resume to Github
Note: For this hands-on lab, the resume is already pushed to Github. You need to have your resume on Github. For guides on how to do this, click Hands-on guide to Git and Github.
Step 5: Deploy Your Resume
Note: For this guides, the resume is already pushed to Github. You need to have your resume on Github. For guides on how to do this, click here.
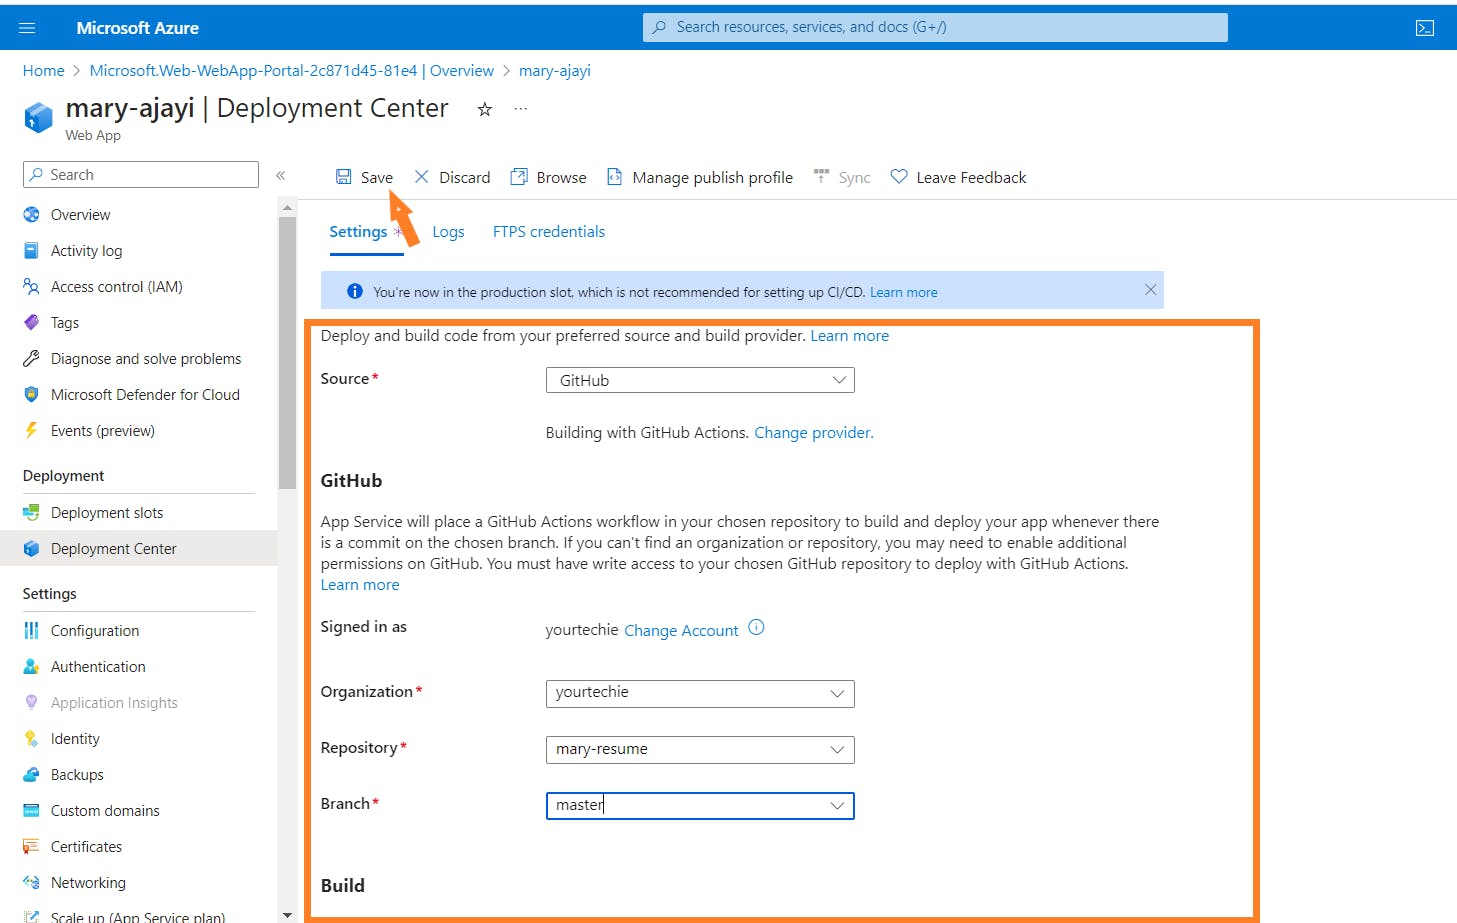
Set Up Deployment Source:
In the newly created App Service, navigate to "Deployment Center" in the left menu.
Choose a source for your deployment (e.g., GitHub, Azure Repos, Bitbucket, Local Git).
Follow the instructions to connect to your chosen source.
Configure Deployment Options:
- Depending on your source, configure deployment options (branch, repository, etc.).
Deploy:
Trigger a deployment manually or set up automatic deployments.
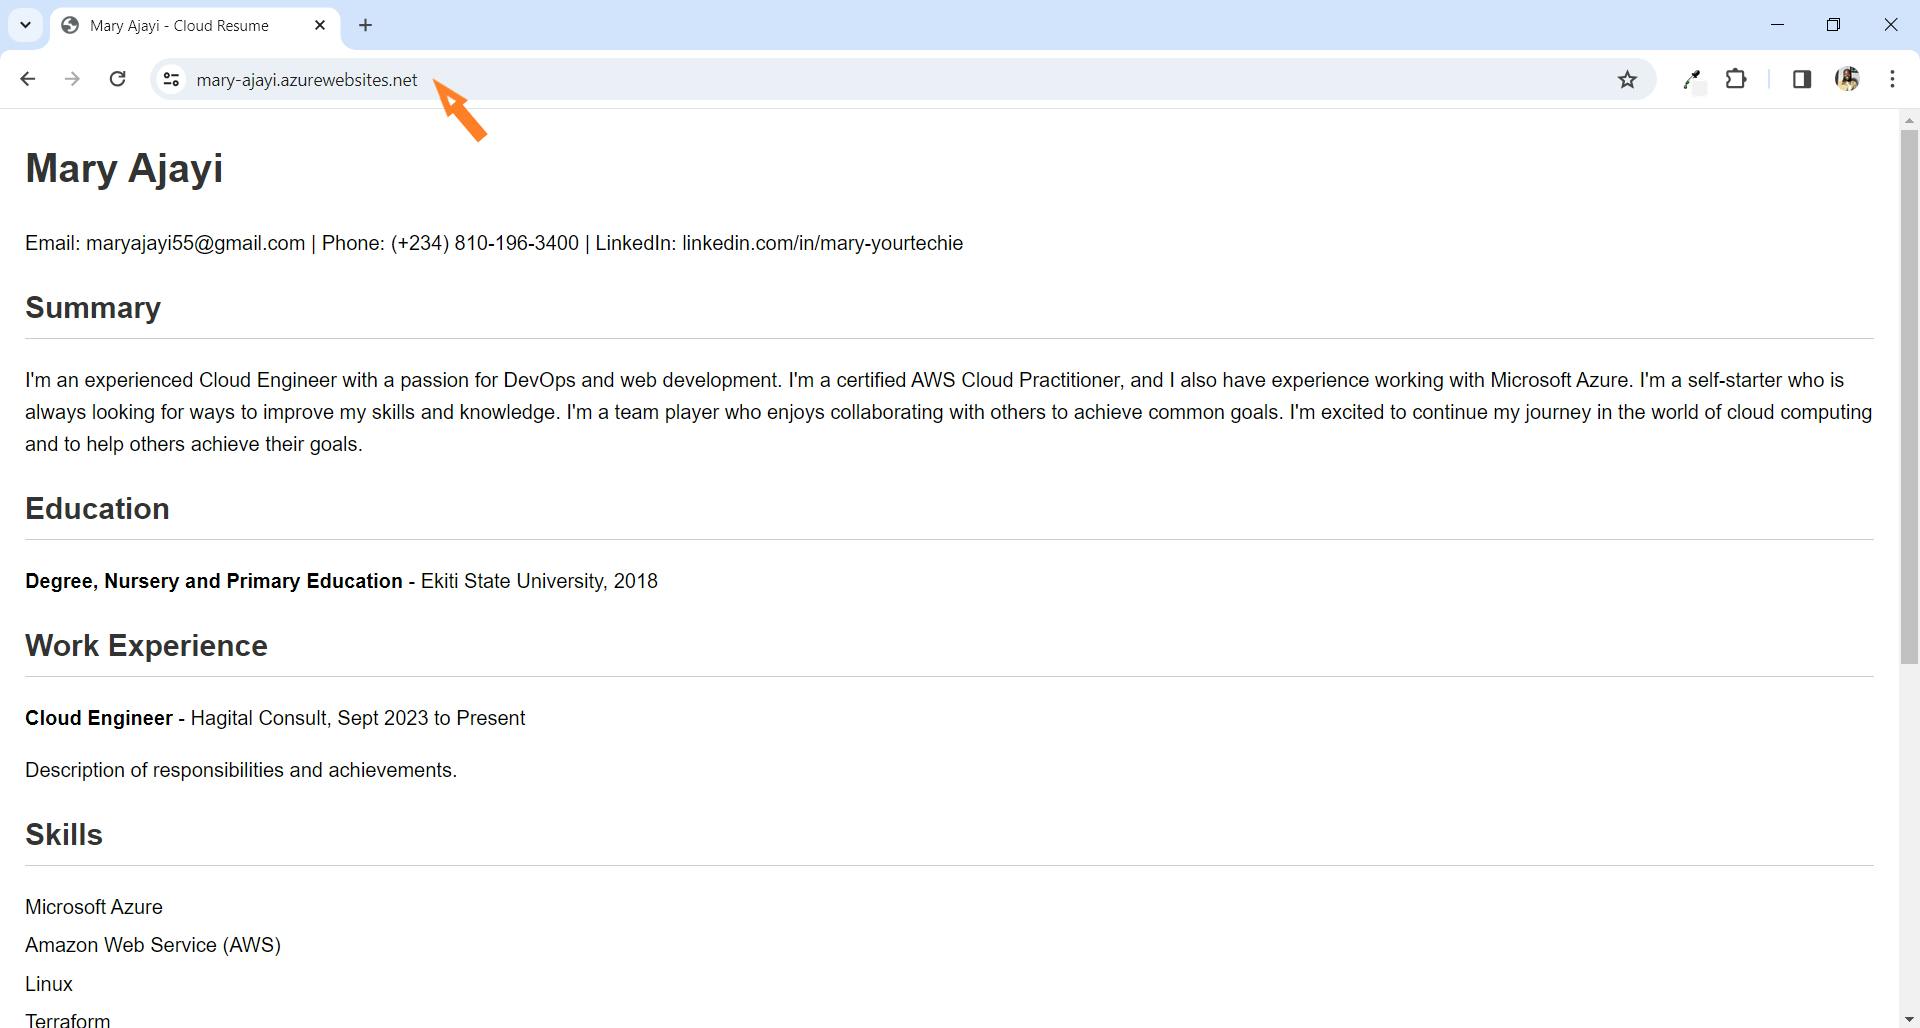
Step 6: Access Your Resume
Browse to Your Web App:
In the Azure Portal, navigate to the "Overview" tab of your Web App.
Click on the URL (e.g.,
https://your-app-name.azurewebsites.net) to access your web app.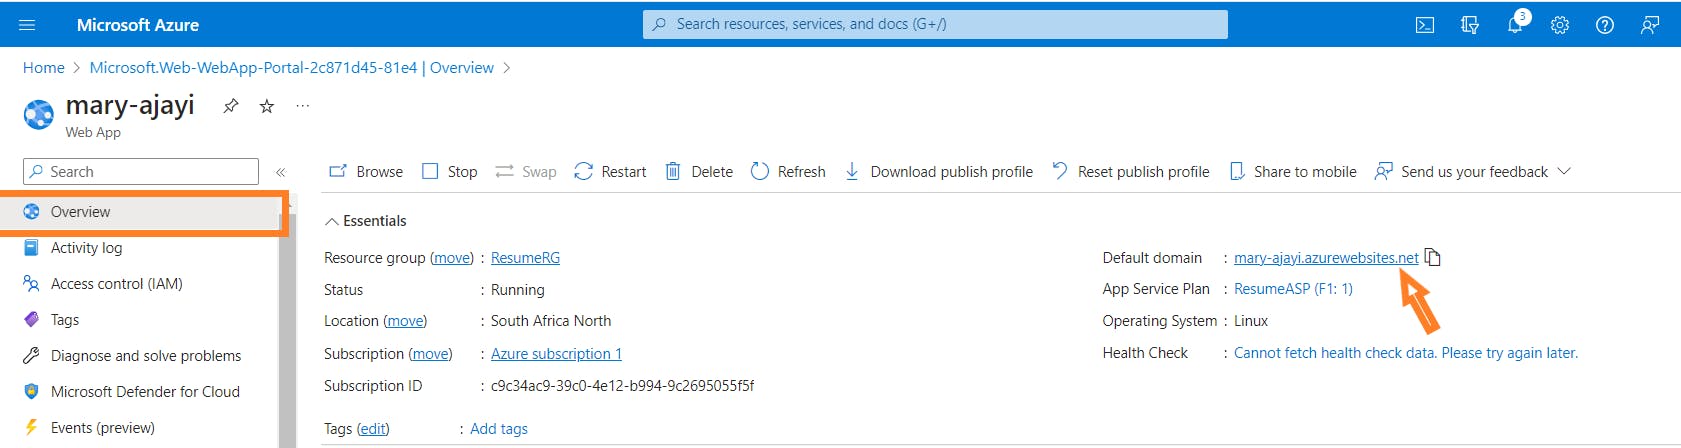
Verify Resume Display:
Check that your resume is displayed correctly on the provided URL.
Step 7: Custom Domain (Optional)
Add a Custom Domain (if needed):
In the Azure Portal, navigate to the "Custom domains" section of your Web App.
Follow the instructions to add and configure a custom domain.
Update DNS Settings:
- Update your domain registrar's DNS settings to point to the Azure Web App.
Step 8: Secure Your Resume (Optional)
Configure HTTPS:
In the Azure Portal, navigate to "SSL/TLS settings" under "Settings."
Configure HTTPS settings and enable "HTTPS Only."
Step 9: Monitoring and Scaling (Optional)
Set Up Monitoring:
- Explore the "Monitoring" and "Scale out" options to monitor and scale your web app based on demand.
Yay! Your resume is now hosted on Azure App Services with a free App Service Plan. You can share the provided URL or your custom domain with others to showcase your resume online.