Step-by-Step Guide to Creating and Configuring a Log Analytics Workspace on Azure


Table of contents
- Azure Monitor Logs
- How to Create a Log Analytics Workspace
- How to Configure Access to Log Analytics Workspace
- Log Analytics RBAC Roles
- Log Analytics RBAC Scopes
- How to configure default Log Analytics Workspace retention policy
- How to configure retention and archive policies by table
- How to configure Log Analytics health status alerts
Azure Monitor Logs
Azure Monitor Logs is a part of Azure Monitor that gathers and arranges log and performance information from the resources you're monitoring. A Log Analytics workspace is a special space for log data from Azure Monitor and other Azure services. Each workspace has its own storage and settings but can bring together data from various services.
For instance, with a Log Analytics workspace, you can gather data from:
Your Azure subscription's resources.
Virtual machine agents.
Application and performance usage data from Azure Monitor application insights.
Diagnostics or log data from Azure Storage.
How to Create a Log Analytics Workspace
Step 1 - In the Azure portal, type "Log Analytics" in the search box. As you type, the list will narrow down. Choose "Log Analytics workspaces."

Step 2 - Click on create
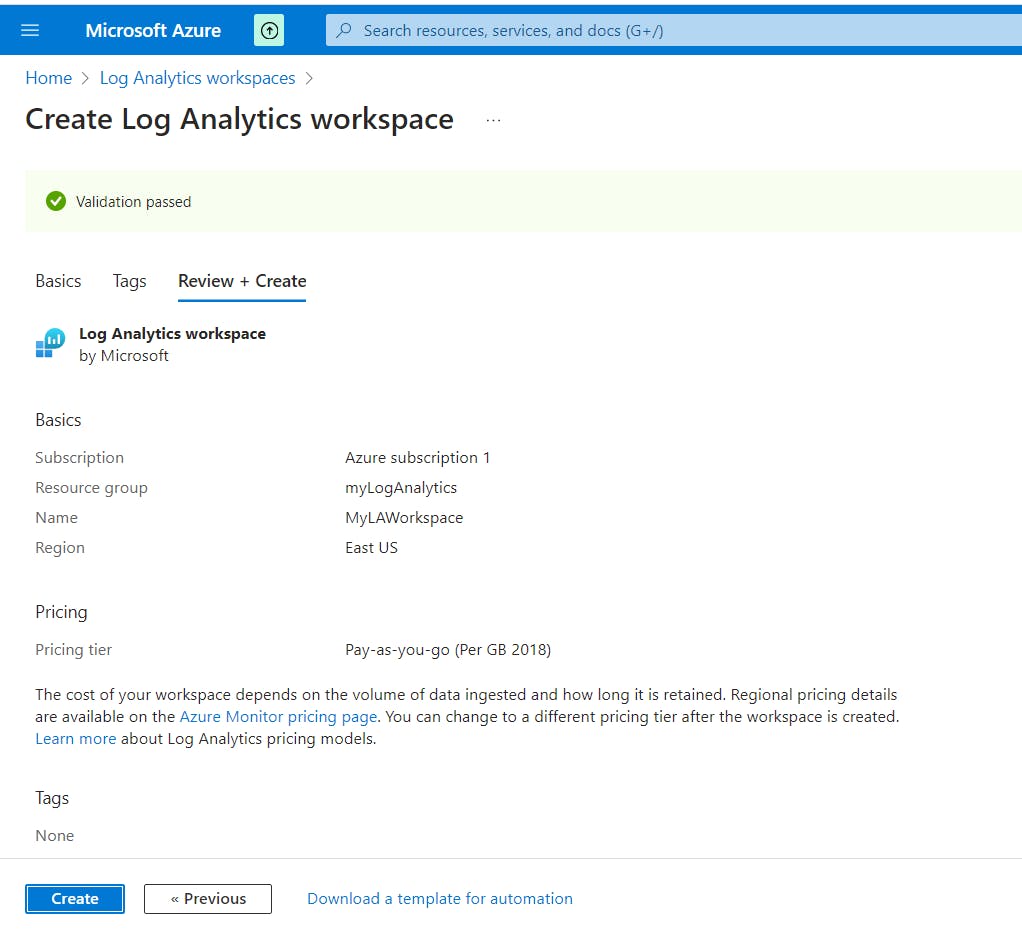
Step 3 - Select a subscription from the dropdown.
Step 4 - Either use an existing Resource Group or create a new one.
Step 5 - Write a name for the new Log Analytics workspace, like MyLAWorkspace. Ensure that this name is unique within the resource group.
Step 6 - Choose an Available Region

Step 7 - Choose "Review + Create" to check the settings. Afterward, select "Create" to make the workspace. The default pricing tier is pay-as-you-go, and you won't incur any charges until you start collecting sufficient data.
How to Configure Access to Log Analytics Workspace
Log Analytics RBAC Roles
There are two predefined RBAC roles associated with Log Analytics. These roles are:
Log Analytics Reader
Log Analytics Contributor
Log Analytics RBAC Scopes
You can set up role access for Log Analytics at the following levels:
Subscription: Provides access to all workspaces within the subscription.
Resource group: Grants access to all workspaces within the specified resource group.
Resource: Allows access to only the designated workspace.
To set up Azure RBAC permissions at the workspace level, follow these steps:
Go to the Log Analytics workspace in the Azure portal.
Choose "Access control (IAM)."
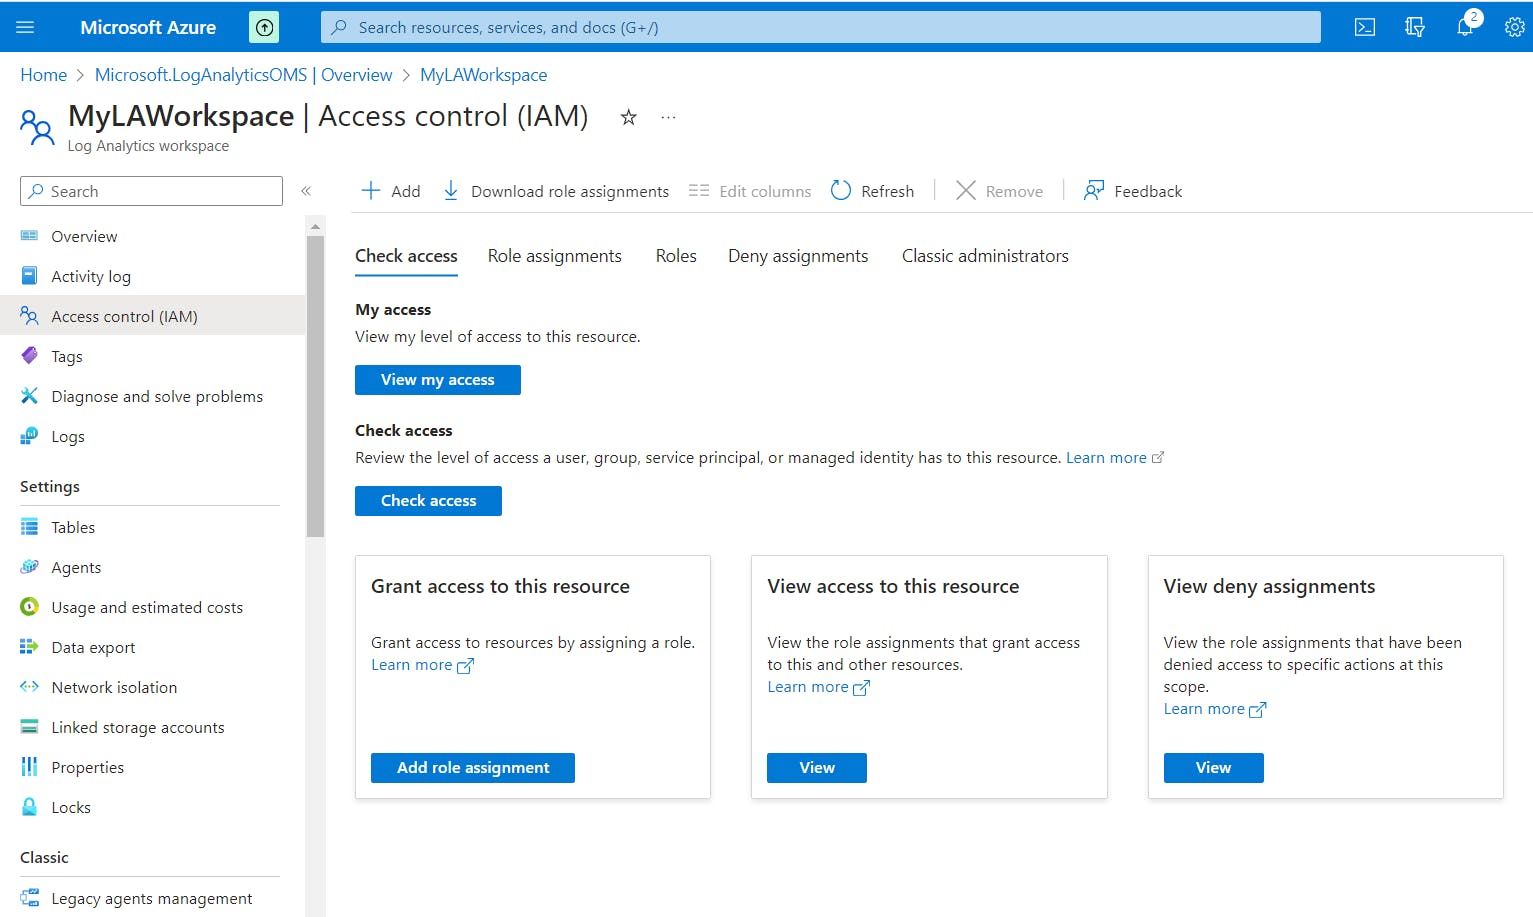
Click on Add, then Add a role assignment.
Select either Log Analytics Reader or Log Analytics Contributor and click Next.

Include the security principal to which you want to assign the role and click Next.
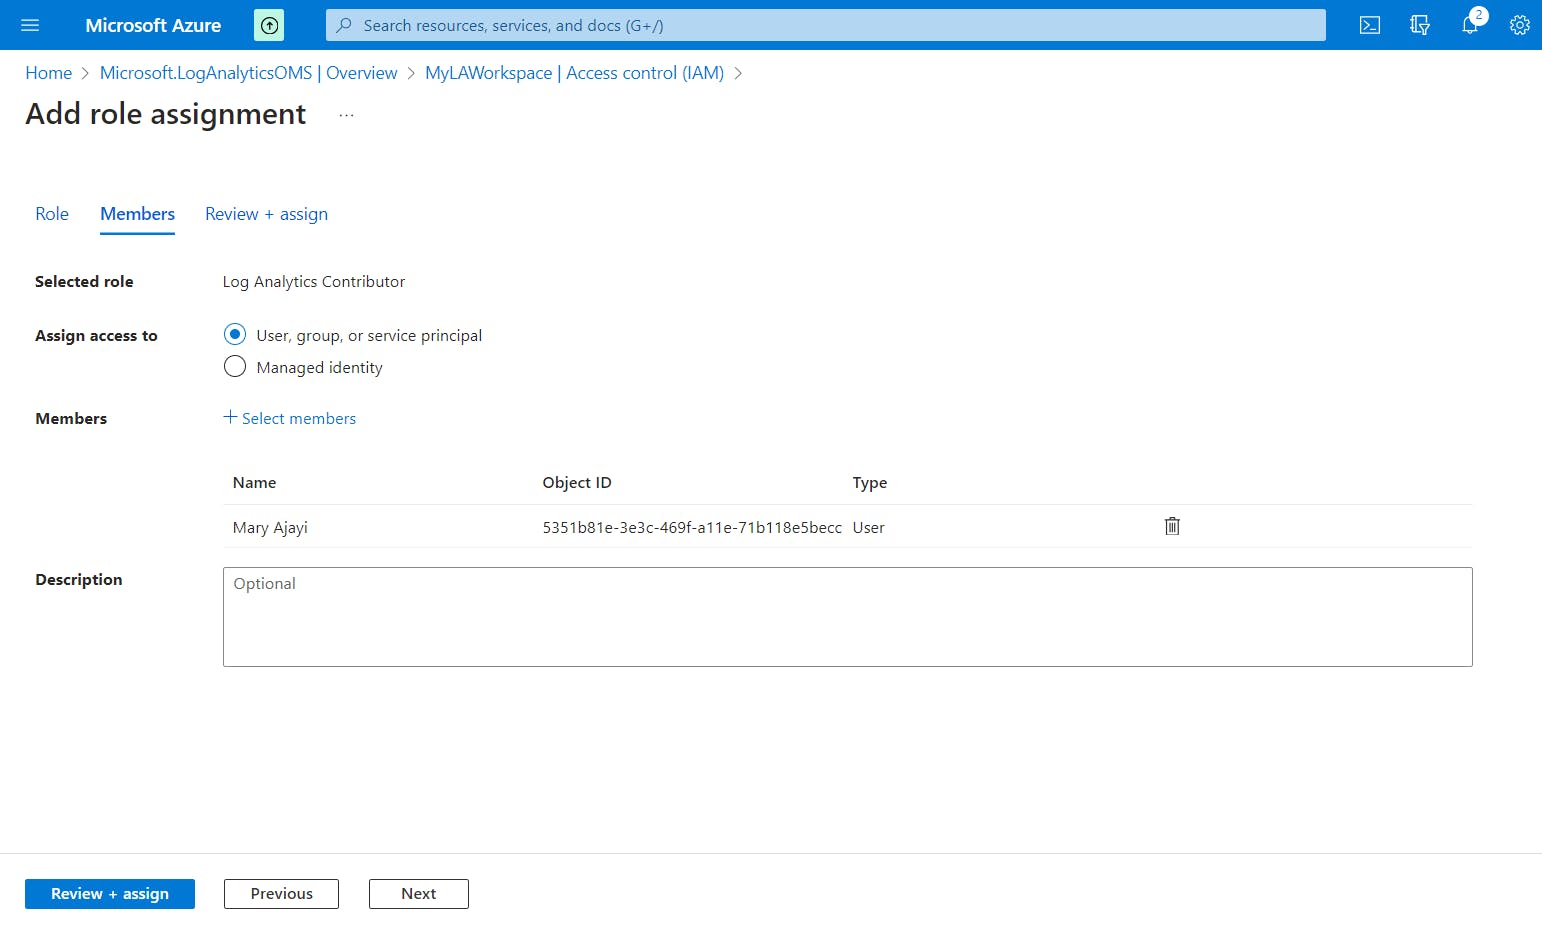
Click Review + assign.
How to configure default Log Analytics Workspace retention policy
To configure the default workspace retention policy:
Go to the Log Analytics workspaces menu in the Azure portal and choose your workspace.
Select "Usage and estimated costs" in the left pane.
Click on "Data Retention" at the top of the page.
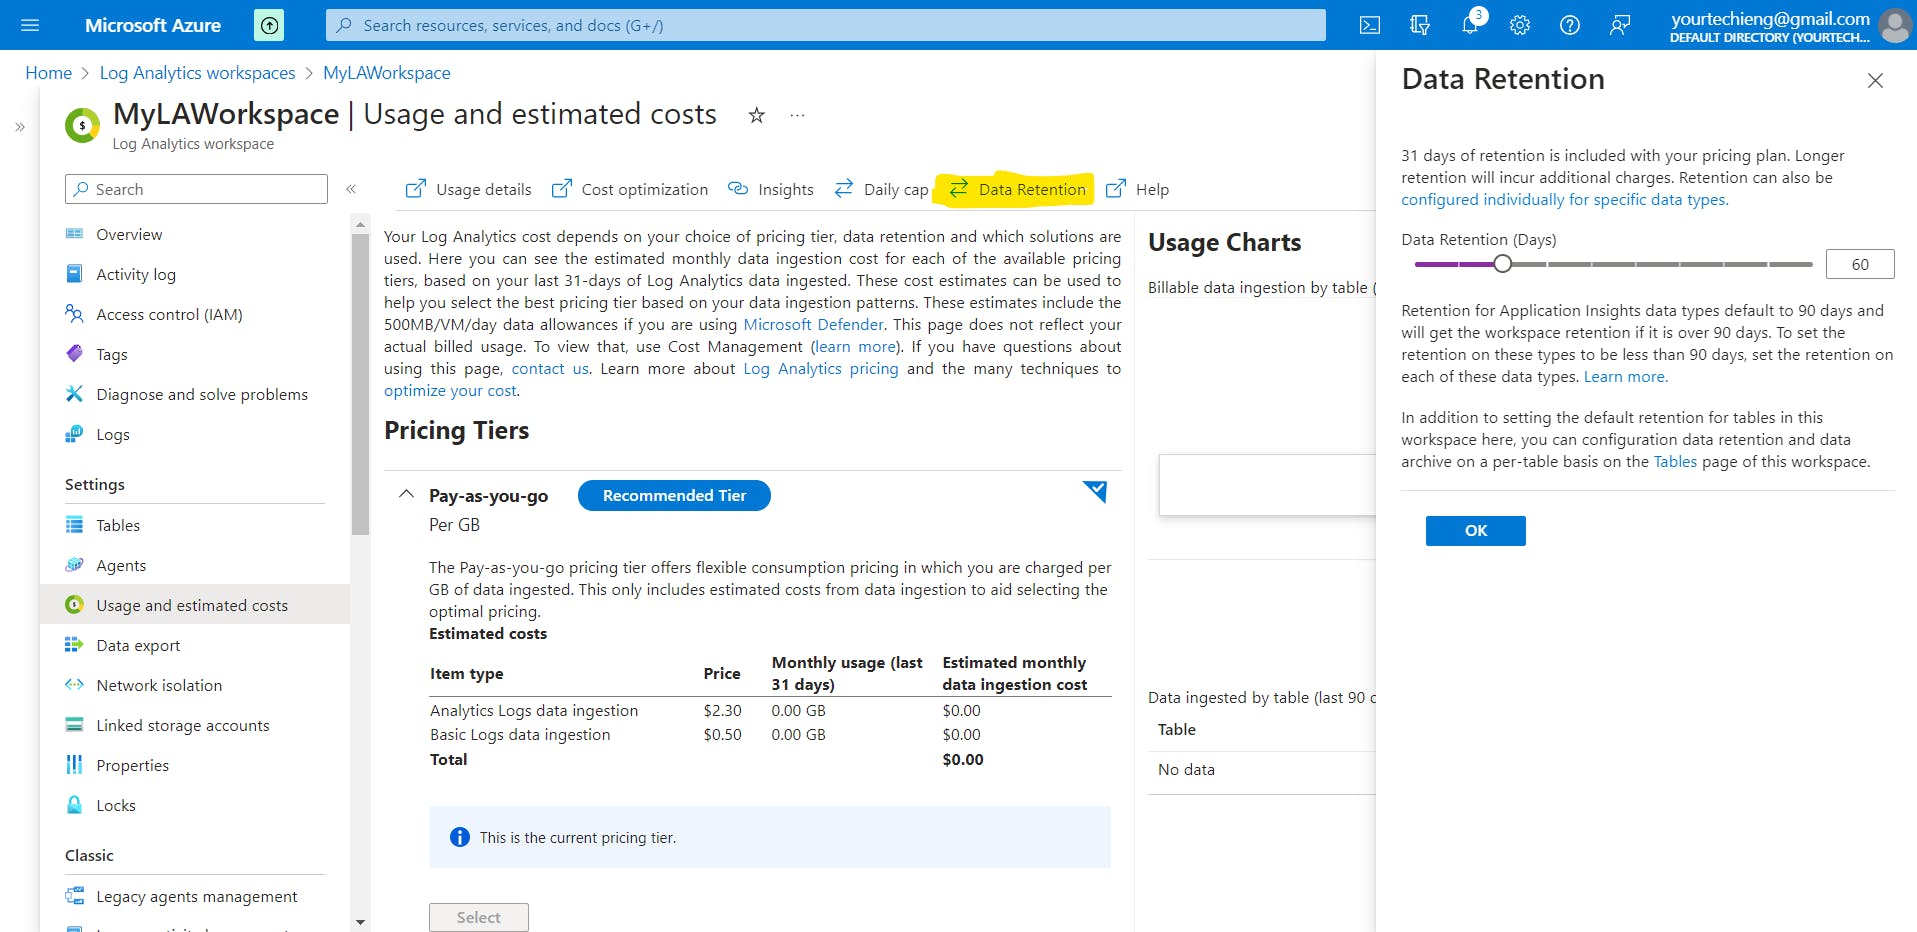
Use the slider to increase or decrease the number of days, then select OK.
How to configure retention and archive policies by table
To establish the retention and archive duration for a table in the Azure portal:
Navigate to the Log Analytics workspaces menu and choose Tables. This screen displays all the tables in the workspace.
Click on the context menu for the table you wish to configure and choose Manage table.

Configure the retention and archive duration in the Data retention settings section on the table configuration screen.

How to configure Log Analytics health status alerts
To activate suggested alert rules:
In the Azure portal, go to the Log Analytics workspace. Under Monitoring, choose the Alerts section, and then click View + setup
This action will open the Set up recommended alert rules page.
